Porschemaniac
Member
- Messages
- 305
Given the recent deterioration in the weld quality of my Clarke 150TE, I decided it was time for a bit of TLC. Top of the list was a new liner, combined with, of course, a new tip.
This work has restored normal service and, for the half hour or so that it took, is well worth doing.
Here, for all you Clarke owners is the step-by-step process. Although this was done on a 150TE, I would think that the service is pretty much the same for all Clarke DIY Welders.
Firstly, remove the side cover to expose the wire feed mechanism.
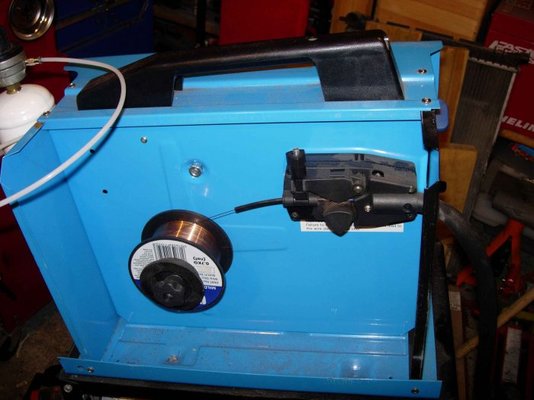
Next, release the wire feed tensioner......
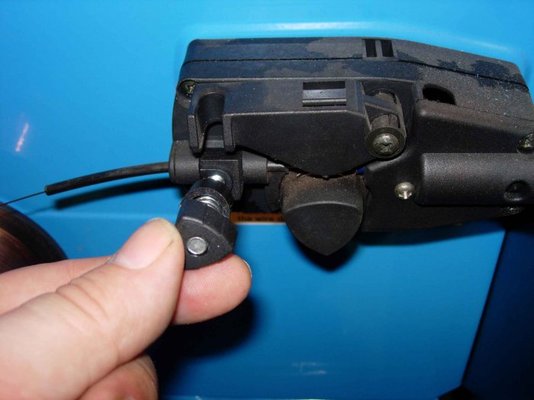
....And flip the adjustment roller up and out of the way......
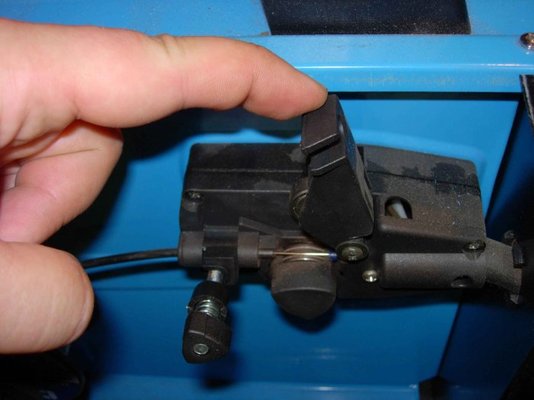
Keeping tension on the cable drum, cut the filler wire.....
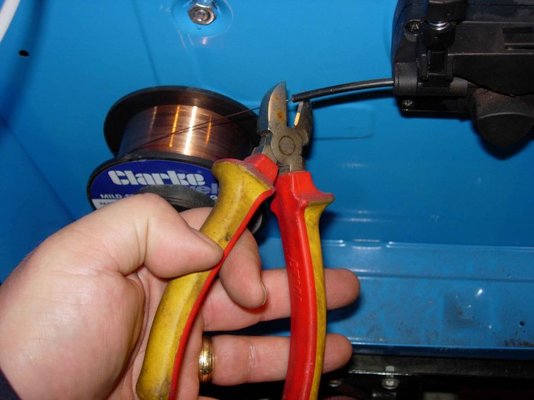
....Making sure to secure the cut end through the small hole in the cable reel. Don't let the cable relax on the drum, or it will happily unwind itself - if this happens, a new reel of wire will be in order.
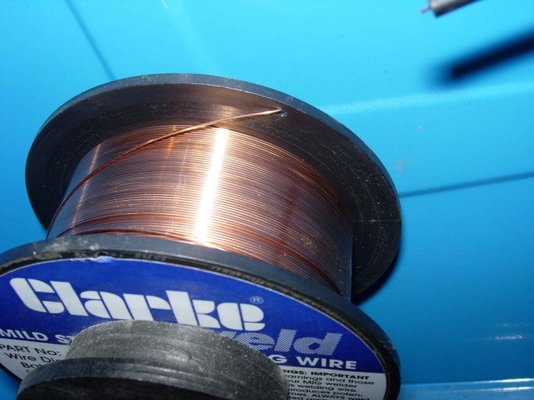
Next, remove the three screws, securing the cable clamp, where it enters the welder....
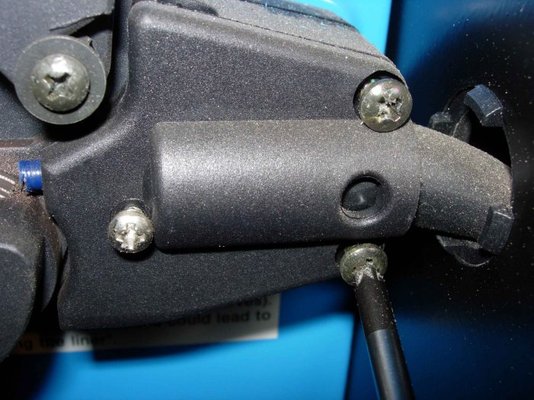
Now, you can clearly see the wire liner, protruding back towards the feed rollers.....
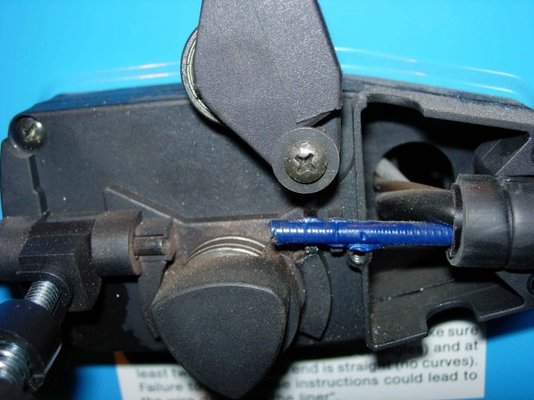
Next, you need to turn your attention to the torch. Begin by removing the five screws that hold the two halves of the torch together....
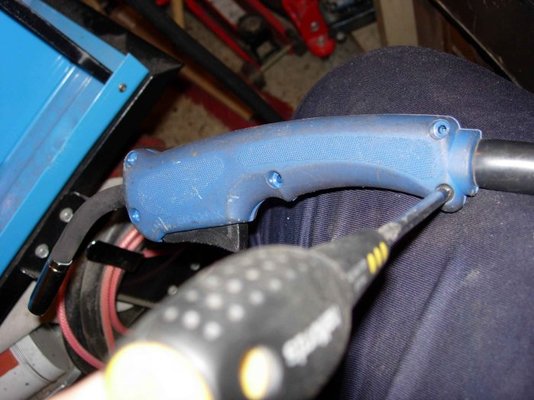
....Exposing the torch internals.....
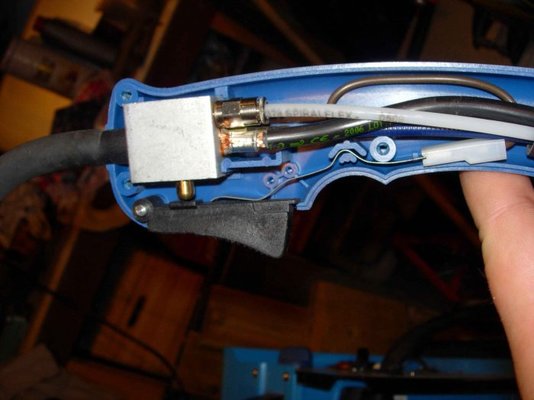
The wire liner, gas feed and power all attach to the alloy valve block. The body of the valve block also acts as part of the torch switch circuit.
Remove all internals from the torch and then, using an 8mm Open End spanner, remove the wire liner.
Whilst doing this, maintain a straight run in the cable from the welder to the torch. This allows the liner to rotate as you are undoing it.
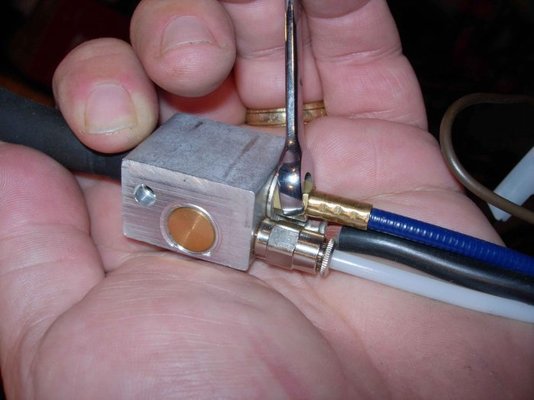
The end fitting also secures the power cable to the valve block - don't forget to reposition this when you assemble the torch.
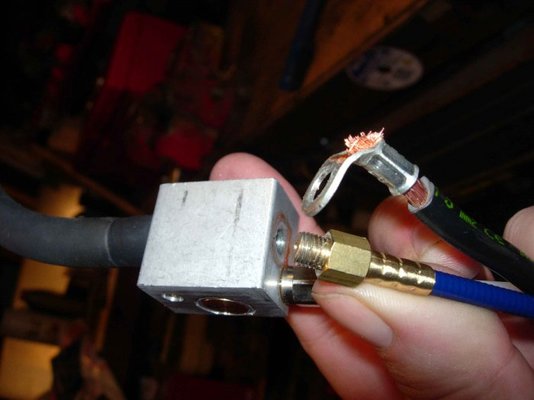
Keeping the cable run straight between the torch and and the welder, slip the old liner out.
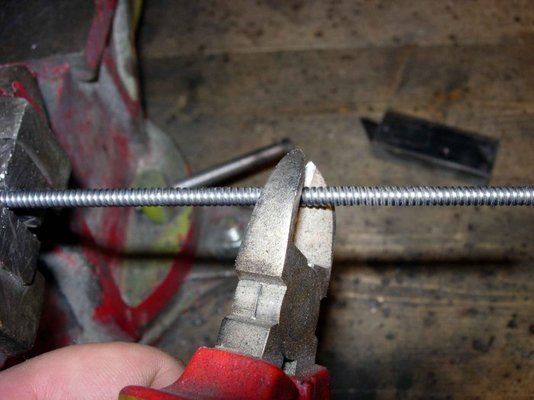
The new liner (as supplied by Machine Mart) is very over-sized. Compare it to the old one and trim to length....
With the cable run still straight, slip the new liner in - ensuring that it protrudes back into the welder.
Slip the end of the cable through the power cable and secure back into the valve block. Take care not to over-tighten - let it make contact and then just nip it up.
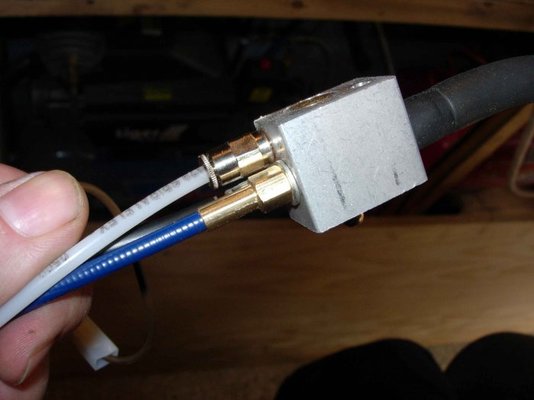
Next, reinstall the torch internals - making sure that the switch is correctly positioned and contacts the valve block when fully depressed and that the cable clamp fits neatly into the reccess in the handle (unlike here!)....
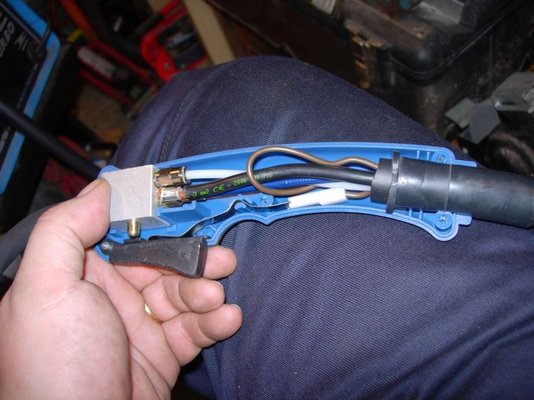
Reposition the torch casing and secure the screws.....

Before securing the cable clamp screws inside the welder, make sure that the outer sheath sits neatly back into position within the clamp and that the liner is correctly positioned - to accept the wire......
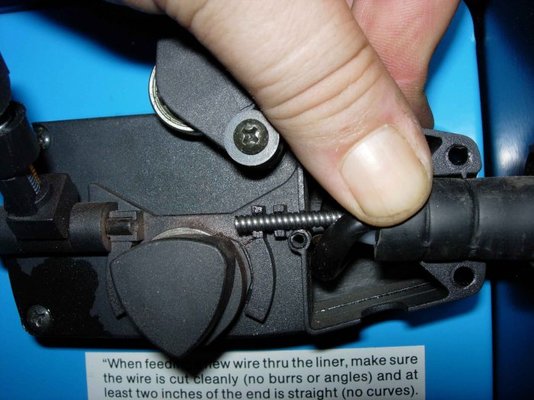
Keeping tension on the cable reel (I find the best way is to simply apply pressure to the wire with your thumb) remove the end of the filler wire from the hole in the reel (the one that you carefully tucked it into earlier) and position across the rollers and into the new liner. Reposition the tensioner and reset the tension.
Personally, I always remove the tip when feeding wire - so it's the ideal opportunity to fit a new one....
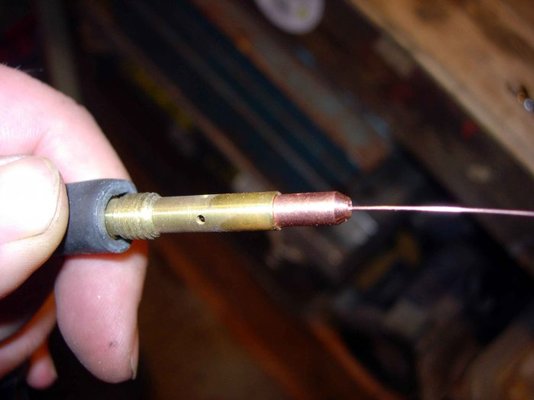
Top it all off with a nice new shroud, refit the wire feed cover and that's it; job done.
This simple task has rejuvinated my lovely little 150TE and, given how simple the job is, will be on the list of regular maintenance going forwards.
Obviously, this is not a definitive guide and based on my own experience - but thought it may be useful for anyone who has not changed a liner before.
Before
This work has restored normal service and, for the half hour or so that it took, is well worth doing.
Here, for all you Clarke owners is the step-by-step process. Although this was done on a 150TE, I would think that the service is pretty much the same for all Clarke DIY Welders.
Firstly, remove the side cover to expose the wire feed mechanism.

Next, release the wire feed tensioner......

....And flip the adjustment roller up and out of the way......

Keeping tension on the cable drum, cut the filler wire.....

....Making sure to secure the cut end through the small hole in the cable reel. Don't let the cable relax on the drum, or it will happily unwind itself - if this happens, a new reel of wire will be in order.

Next, remove the three screws, securing the cable clamp, where it enters the welder....

Now, you can clearly see the wire liner, protruding back towards the feed rollers.....

Next, you need to turn your attention to the torch. Begin by removing the five screws that hold the two halves of the torch together....

....Exposing the torch internals.....

The wire liner, gas feed and power all attach to the alloy valve block. The body of the valve block also acts as part of the torch switch circuit.
Remove all internals from the torch and then, using an 8mm Open End spanner, remove the wire liner.
Whilst doing this, maintain a straight run in the cable from the welder to the torch. This allows the liner to rotate as you are undoing it.

The end fitting also secures the power cable to the valve block - don't forget to reposition this when you assemble the torch.

Keeping the cable run straight between the torch and and the welder, slip the old liner out.
The new liner (as supplied by Machine Mart) is very over-sized. Compare it to the old one and trim to length....

With the cable run still straight, slip the new liner in - ensuring that it protrudes back into the welder.
Slip the end of the cable through the power cable and secure back into the valve block. Take care not to over-tighten - let it make contact and then just nip it up.

Next, reinstall the torch internals - making sure that the switch is correctly positioned and contacts the valve block when fully depressed and that the cable clamp fits neatly into the reccess in the handle (unlike here!)....

Reposition the torch casing and secure the screws.....

Before securing the cable clamp screws inside the welder, make sure that the outer sheath sits neatly back into position within the clamp and that the liner is correctly positioned - to accept the wire......

Keeping tension on the cable reel (I find the best way is to simply apply pressure to the wire with your thumb) remove the end of the filler wire from the hole in the reel (the one that you carefully tucked it into earlier) and position across the rollers and into the new liner. Reposition the tensioner and reset the tension.
Personally, I always remove the tip when feeding wire - so it's the ideal opportunity to fit a new one....

Top it all off with a nice new shroud, refit the wire feed cover and that's it; job done.
This simple task has rejuvinated my lovely little 150TE and, given how simple the job is, will be on the list of regular maintenance going forwards.
Obviously, this is not a definitive guide and based on my own experience - but thought it may be useful for anyone who has not changed a liner before.
Before


