


Spray Painting Tutorial
This tutorial is aimed at helping DIY spray painters finish a car to a reasonable standard. It's the product of my own mistakes over many years of painting cars on a DIY basis.
Most of the pages cover materials and techniques, but be sure to read the air supply page and check that your compressor isn't spraying water with the paint - It's a very common problem and will ruin the paint in a small number of years.
Spray painting technique
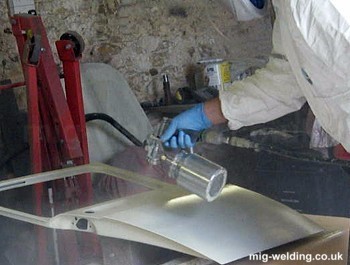
Anyone can spray to a decent standard so long as the basics are right. The tutorial starts with paint mixing techniques, then swiftly moves on to setting up the air pressure and fan shape on the spray gun.
A video demonstrates basic spraying techniques including gun angles, distance from panel and overlap, and a few more tips are thrown in to the mix along the way.
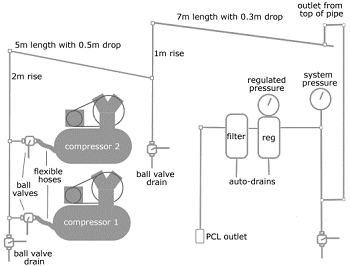
Air system - Removing water from a compressed air supply
Water in the air line is the most common cause cause of micro-blistering in DIY paint finishes. That's because most DIY compressors don't have any water removal devices.
A professional spray booth will use a dryer, but it's the more cost effective options for DIY painters that are included in this page.
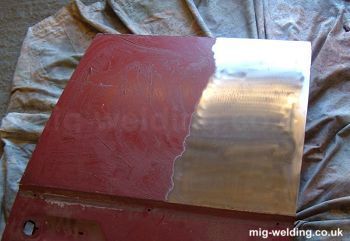
Paint stripping car panels
There's no need to start from bare metal if the existing paint is in good condition. But if you do decide to start from scratch using mechanical methods you might put too much heat into the panels causing distortion.
On this page I've combined strip and clean discs with paint stripper to reduce the heat input and increase the speed of paint stripping.
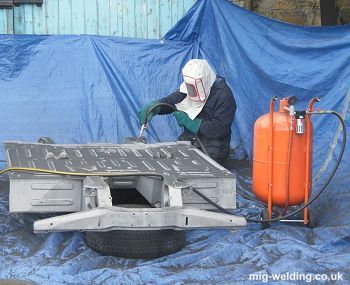
DIY sand blasting equipment and technique
Sand blasting is an efficient way to remove surface rust and thin paint especially from inaccessible areas. With a 14cfm compressor, pressurised sandblaster and patience it's possible to blast whole chassis, body shells, and even thin outer body panels.
The page describes the equipment and grit required, and includes all the tips I could think of after getting the system working nicely.
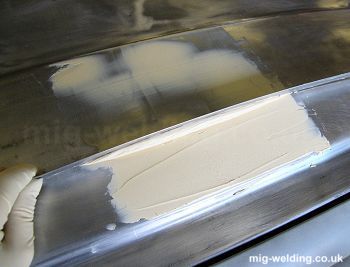
Applying body filler
A metal rule can be used to help apply body filler (bondo) and saves time, sanding, and wastage. I'd claim to have prepared a whole car using just 1L of filler had I not had to go back for a second and then third tin.
Also techniques for using stopper (knifing putty) and final sanding before paint.
Primers and wet flatting
Primer should bond effectively to bare metal, and this page includes some tips about selecting primers and spraying technique for bare metal.
High build primers are used to level panels prior to colour coating. Generally after the high build primer coats a thin guide (or flash) coat is applied and then sanded off completely to ensure the primer is completely smooth.
The page also includes some notes on other types of primer and their applications.

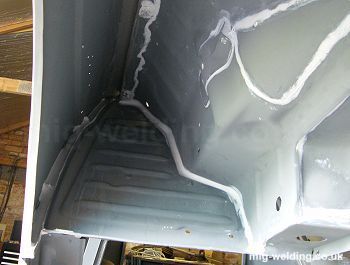
Seam sealing
Decent seam sealing is essential to the life of any restoration. Cars tend to be assembled with overlapping spot welded joints. When water finds it's way into the gaps between the joints it can't get out again. So it just sits there and rusts the joint away.
Stopping water getting into the joints is the way to avoid this rust. The page starts with what happens when water does get in, and goes on to how to apply sealant neatly.
Anti-stonechip primer
Anti-stonechip primer over-coated with colour top coat is an excellent way to protect under floor and wheelarch areas, but the paint does settle in the tins which can cause disaster for the unwary (me). It's far from uncommon to be caught out by old tins sold as new.
The page covers how to work out if the tin is any good, then moves onto more useful things such as thinning the primer for use on exposed exterior panels with a flat finish rather than the normal orange peel finish.
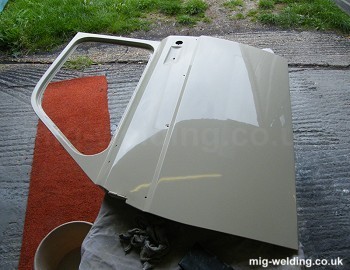
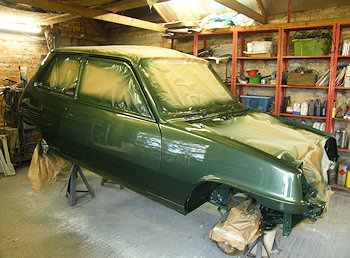
Colour coats and finishing paint
A DIY painter will often wet sand a colour coat before final spraying or polishing (depending on the finish required). This page describes each approach and offers some other tips for colour.
Colour coats are much more sensitive to technique than primer coats, so a a few more technique tips have been included on the page.
Spray Painting in Metallic
Thee main trick to metallic paint is to spray it in a basecoat and clear coat system. The base coat is a delight to use and leaves a smooth even finish so long as it is appliied thinly.
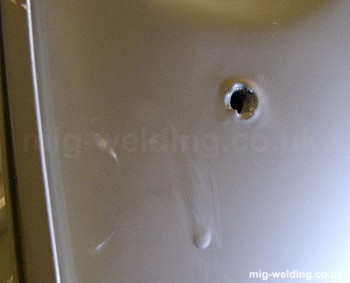
Paint faults and how to rectify them
Paint is very flexible - It's often possible to balance out time and material quantities against technique, and given enough time on a job a DIY sprayer might end up with a better finish than a professional has the time to achieve.
For the DIYer there will be the occasional disaster along the way, This page covers the normal disasters and offers advice about how to sort them out so that nobody will ever notice. From overspray to drips and flies, dust and orange peel.
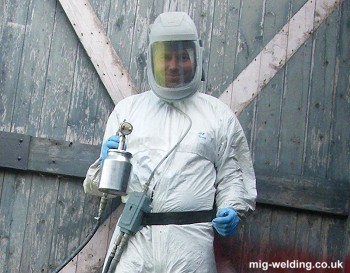
Paint Safety
Safety is the most important bit of painting to not get wrong as mis-use of some paints can result in nasty health problems.
Cellulose paints aren't too bad, but 2-pack is especially nasty and requires lots of precautions and safety gear. The page goes through some of the masks available and the other things you'll also need.
Credits
Thanks to everyone on the forum who proof read and made suggestions.


