peterd51
happy to be here!
- Messages
- 1,593
Hi,
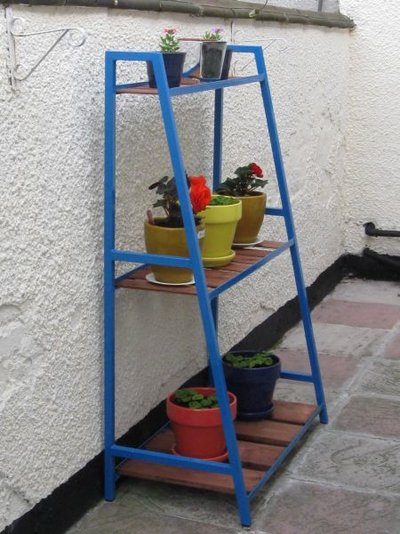
it's been a while since I actually /made/ anything...car repairs, studying, bad weather, holidays, etc, keep getting in the way! So when my sister in law saw this plant stand thing in a garden centre, a bit too small, overpriced and way too flimsy, she asked if I could make something similar.
Basically it's a three shelf unit but it's around 18" at the base and 6" at the top, with vertical back legs and sloping front legs. I decided it should be 54" high and 36" wide and it'd 'look' about right.
Getting the sloping front legs would be a bit of a challenge, and making it stable more so. The easiest way I could find without resorting to complex drawings and caluclations was to make one rear leg and attach the top side rail. Then lean it against the wall using a spirit level to ensure it was vertical, and using two tape measures, one showing 18" out at the base and the other to measure the front leg length, I got a figure around 1.5 inches longer than the back leg.
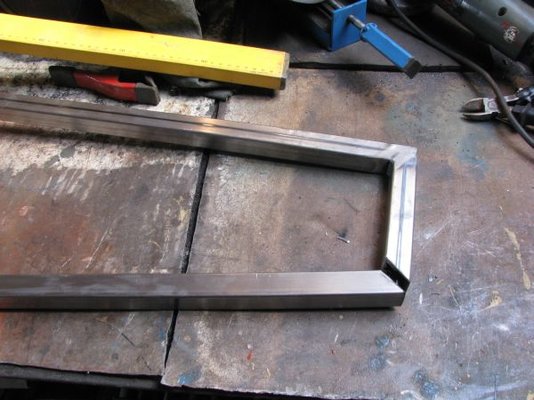
The top rail has a 45 degree angle and the front leg is cut to match it while maintaining the right base measurement. I knocked up the second side to match the first. Note that the tops are slightly closer together than the bottom as I hadn't angled the bottom of the front legs to sit 'square' on the ground at this point.
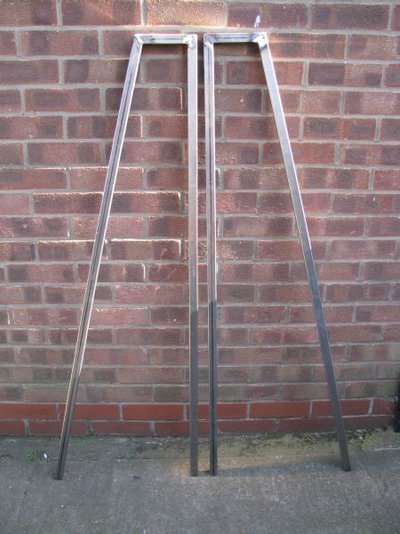
I measured up and cut some side rails to strengthen the sides and welded them in, did one side first and then made the second side match it pretty damn closely.
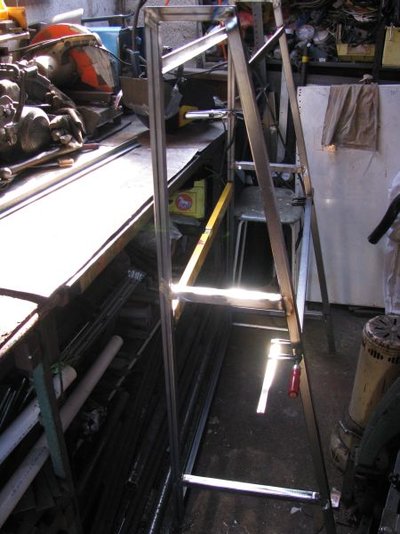
Next I needed to add six rails front and rear to support the shelves and it's a bit tight in my workshop for this sort of thing. Using a set square and then a spirit level for final settings, I tacked the back rails in place on both sides. The front rails were a little trickier but I found it easiest to use a clamp on each side to rest the rail on.
This allowed minor adjustments setting it up with the spirit level. After welding the big surprise was that it didn't need to be /boshed/ to get it square!
Next I took it outside and painted it with zinc phosphate primer and a gloss coat of the blue paint that I can't seem to get rid of...been using it for years and I still have 3/4 gallon left! The woody bits are out of my store shed... the bottom shelf is four old drawer sides about 3/4" thick while the middle and top shelves are off-cuts from when I made the shed. These have all been cut to length, just had a quick rub with a sanding block and then a bit of dark stain splashed on them.
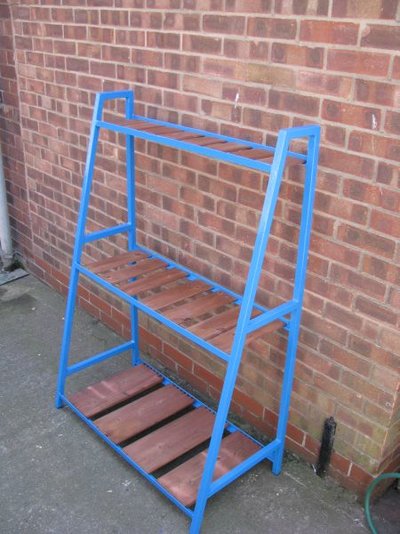
It's to go outside the sister in laws back door as she can't see her garden from the kitchen window...I may get a photo of it trimmed up with plants in a week or so...
Regards
Peter
it's been a while since I actually /made/ anything...car repairs, studying, bad weather, holidays, etc, keep getting in the way! So when my sister in law saw this plant stand thing in a garden centre, a bit too small, overpriced and way too flimsy, she asked if I could make something similar.
Basically it's a three shelf unit but it's around 18" at the base and 6" at the top, with vertical back legs and sloping front legs. I decided it should be 54" high and 36" wide and it'd 'look' about right.
Getting the sloping front legs would be a bit of a challenge, and making it stable more so. The easiest way I could find without resorting to complex drawings and caluclations was to make one rear leg and attach the top side rail. Then lean it against the wall using a spirit level to ensure it was vertical, and using two tape measures, one showing 18" out at the base and the other to measure the front leg length, I got a figure around 1.5 inches longer than the back leg.

The top rail has a 45 degree angle and the front leg is cut to match it while maintaining the right base measurement. I knocked up the second side to match the first. Note that the tops are slightly closer together than the bottom as I hadn't angled the bottom of the front legs to sit 'square' on the ground at this point.

I measured up and cut some side rails to strengthen the sides and welded them in, did one side first and then made the second side match it pretty damn closely.
Next I needed to add six rails front and rear to support the shelves and it's a bit tight in my workshop for this sort of thing. Using a set square and then a spirit level for final settings, I tacked the back rails in place on both sides. The front rails were a little trickier but I found it easiest to use a clamp on each side to rest the rail on.
This allowed minor adjustments setting it up with the spirit level. After welding the big surprise was that it didn't need to be /boshed/ to get it square!

Next I took it outside and painted it with zinc phosphate primer and a gloss coat of the blue paint that I can't seem to get rid of...been using it for years and I still have 3/4 gallon left! The woody bits are out of my store shed... the bottom shelf is four old drawer sides about 3/4" thick while the middle and top shelves are off-cuts from when I made the shed. These have all been cut to length, just had a quick rub with a sanding block and then a bit of dark stain splashed on them.

It's to go outside the sister in laws back door as she can't see her garden from the kitchen window...I may get a photo of it trimmed up with plants in a week or so...
Regards
Peter

 Scribe a line at the same measurement each end frame, and put it to the line. No level needed.
 I better not show this to my girlfriend or she'll get ideas. Oh, and the colour; do yourself a favour and get rid of it.
  I had some bad (as in colour) red paint a while back and everything I did ended up red, I wish I had just cut my losses and gotten rid of it to begin with.

