daedalusminos
Member
- Messages
- 2,210
- Location
- Norwich
Following interest in photos posted on 'Stuff you have made today', @mtt.tr suggested I write up the process...here it is...
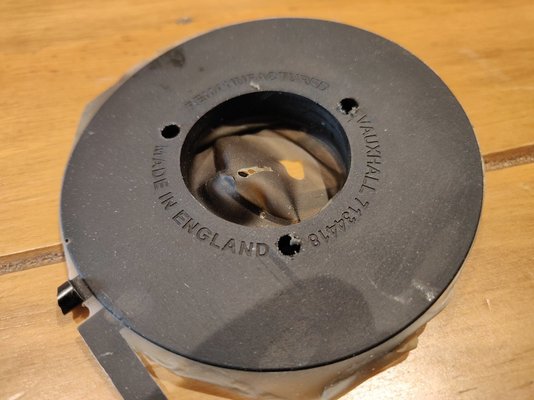
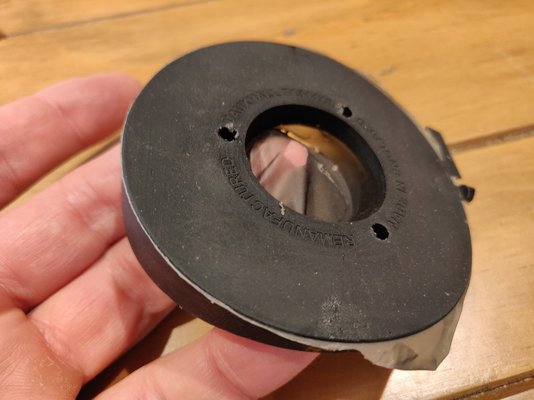
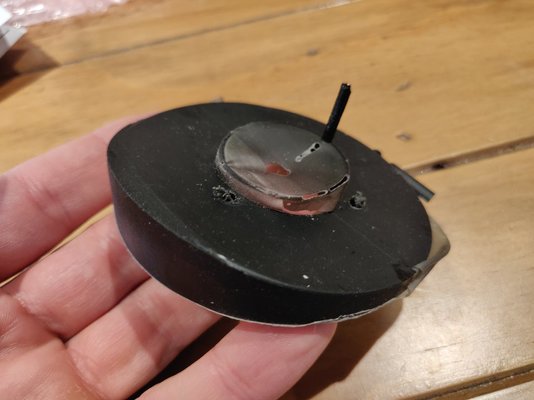
My brother approached me and asked whether I could re-manufacture some rubber parts for his 1956 E Series Vauxhall Velox:
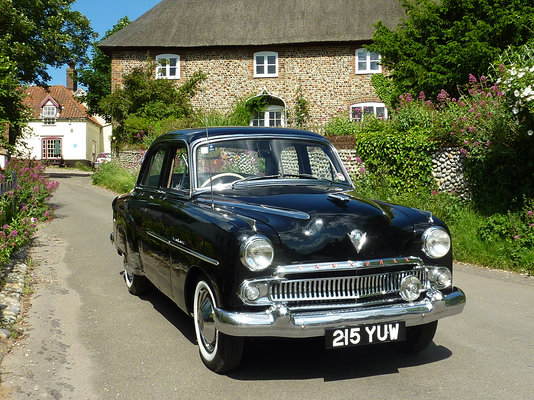
The part in question is the rubber plinth for the rear indicator lamps which haven't fared too well after 60 or so years of New Zealand sun (my brother imported the car several years ago)...
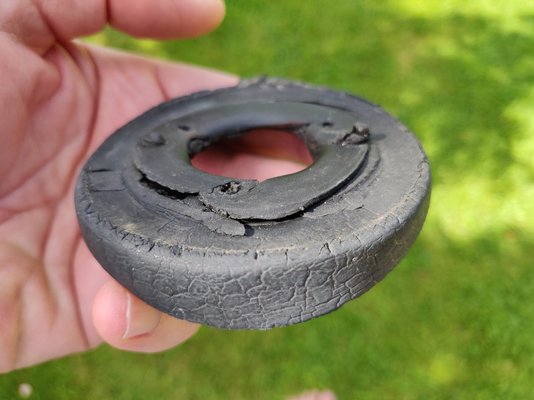
First up was to model the body work profile the lamp attaches to in Fusion 360 - difficult to see in the photo but the bodywork is actually a two way curve...
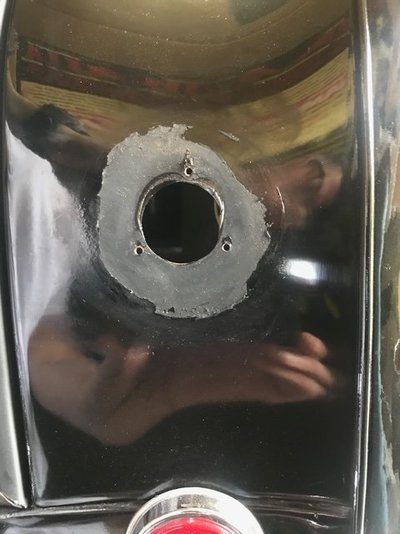

The curved pane was constructed from a form plane and then gently manipulated - nothing technical, just hold the old part in front of the screen. Next add add a cyclinder with the three mounting holes and central aperture and use the form plane to cut the back - job done...

This was then printed on the FDM in Ninjaflex to verify fit - which turned out to be spot-on.
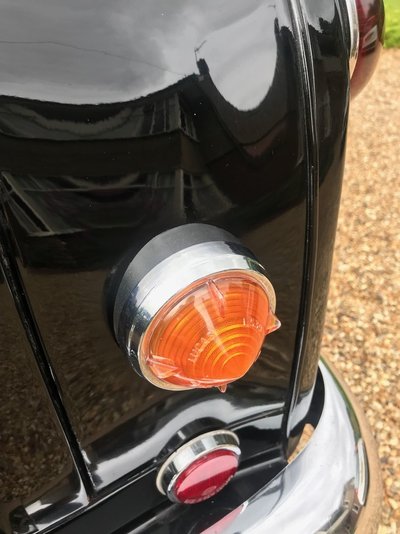
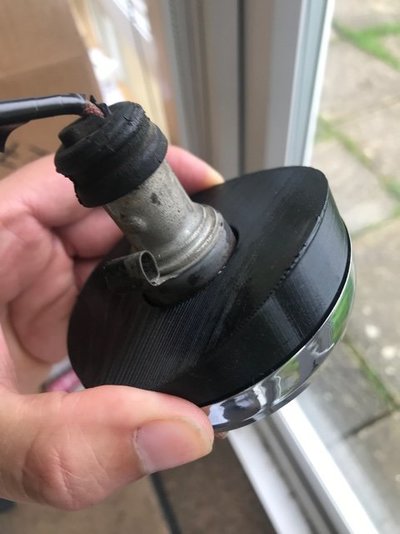
The quality of the FDM is actually pretty good, but for maximum authenticity decided to go ahead with the rubber mould, plus the plinth actually has to form a watertight seal against body and lamp which may have been compromised with the plasticky Ninjaflex. Designing the moulds from here is relatively straight forward, devise part lines, risers and details.


The three mounting holes would be formed from 4mm dowel pins. Next up was to resin print these - offering far better resolution than the FDM in XYZ of 50um pixel size, the resin printer is ideal where cosmetic rather than functionality is required. This is quite a massive part for a resin print and I'm printing off the bed with a lot of support scaffolding, this was the first time I'd used this particular resin (Siraya Tech 'Build') and needed to up the layer exposure time from 2.25s to 2.75s. That and a slight slow down in lift speed due to the area of each layer resulted in a total print time of approx 10hrs....and another 10hrs for the other half.
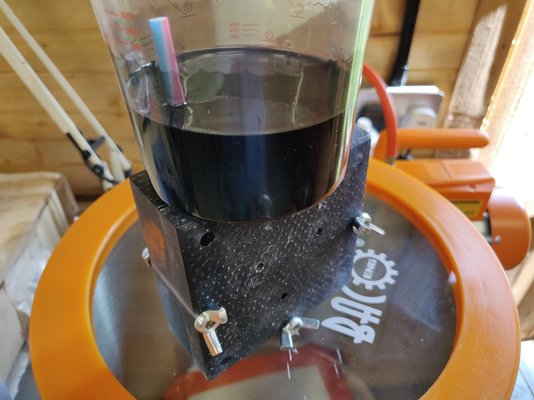
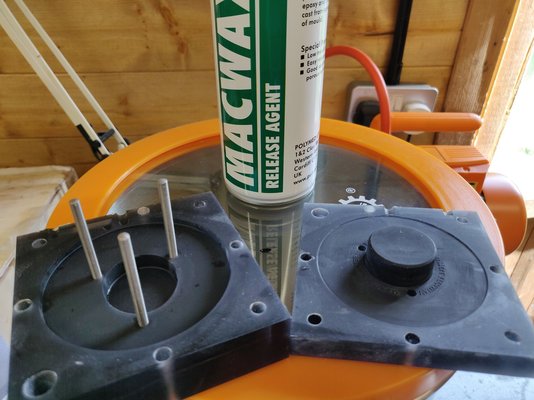
Completed moulds with pins inserted and sparayed with release agent (sitting atop the vacuum chamber)...
Continued in next post...
My brother approached me and asked whether I could re-manufacture some rubber parts for his 1956 E Series Vauxhall Velox:

The part in question is the rubber plinth for the rear indicator lamps which haven't fared too well after 60 or so years of New Zealand sun (my brother imported the car several years ago)...

First up was to model the body work profile the lamp attaches to in Fusion 360 - difficult to see in the photo but the bodywork is actually a two way curve...

The curved pane was constructed from a form plane and then gently manipulated - nothing technical, just hold the old part in front of the screen. Next add add a cyclinder with the three mounting holes and central aperture and use the form plane to cut the back - job done...
This was then printed on the FDM in Ninjaflex to verify fit - which turned out to be spot-on.


The quality of the FDM is actually pretty good, but for maximum authenticity decided to go ahead with the rubber mould, plus the plinth actually has to form a watertight seal against body and lamp which may have been compromised with the plasticky Ninjaflex. Designing the moulds from here is relatively straight forward, devise part lines, risers and details.
The three mounting holes would be formed from 4mm dowel pins. Next up was to resin print these - offering far better resolution than the FDM in XYZ of 50um pixel size, the resin printer is ideal where cosmetic rather than functionality is required. This is quite a massive part for a resin print and I'm printing off the bed with a lot of support scaffolding, this was the first time I'd used this particular resin (Siraya Tech 'Build') and needed to up the layer exposure time from 2.25s to 2.75s. That and a slight slow down in lift speed due to the area of each layer resulted in a total print time of approx 10hrs....and another 10hrs for the other half.
Completed moulds with pins inserted and sparayed with release agent (sitting atop the vacuum chamber)...

Continued in next post...


