Wallace
Member
- Messages
- 7,705
- Location
- Staines, Middlesex, England.
I bought this Clarke bandsaw some years back new on a Vat free day with the intention of making a few improvements after seeing some of the useful modifications other people had been making online. Two areas seemed to stand out immediately from most users as needing attention, the flimsy stand and the poor quality blade.
Bearings & Setup.
First upgrade almost out of the box was a new set of guide roller bearings which were so tight as supplied one of the bearings cracked. I tried calling Clarke for a replacement under warranty just for the fun of it and they sent a replacement in the post which was too big and so was the next replacement replacement! I gave up and bought some SKF bearing as they are cheap enough and once fitted there was a marked improvement in cutting accuracy. Using the original blade I managed to get good square cuts on tubing and 50mm bar needed very little facing off in the lathe.
Upright Saw Table.
I tried the upright saw table and pathetic support bracket supplied just to say I had. A seat should also be supplied so you can sit on the vice to stop the saw tipping over and being stood straddling the saw to use the table doesn't feel comfortable. I have not used the table since as it flexes too much and the throat depth limits cutting sizes but the blade being held firmly in the rollers does make cutting nice. Off the back of this I collected another used 6x4 saw with the intention of adding a third wheel and straightening the blade to make an upright saw with a better throat depth. I have since obtained an upright wood bandsaw to convert and part refurbished it so that project is on hold at the moment.
Blades & Adjustment.
I bought a better blade as a spare but the original lasted so long I did not replace it for quite a while but the nice expensive new one soon broke once fitted! I repaired the new blade and this highlighted a problem, the blade was now too short for the machine adjustment so I made the machine fit the blade. By making 3 short incisions with a cutting disc I removed a small amount from the machine casing to allow greater adjustment and the reuse of broken blades.

Part of casing removed to allow shorter repaired blades to be used.
Stand & Wheels.
The flimsy stand is let down by a lack of decent feet as the whole machine sits on flexible sheet steel edges which easily fold over if the machine is moved. Very little is needed to improve the stand and stiffen it up but most people replace it in some way to get rid of the laughable plastic wheels. I tried fitting the wheels at either end of the machine and came to the conclusion each time I tried moving the machine with the supplied handle it was going to fall over. There is a knack to moving it I mastered but slowly parts started to pile up to make a better safer set.

This is R&D WIP. I'm Currently altering the height over a period of time to see what height I want, could be years before It's finished!
Lots of 25x25x3 offcuts started to take shape with a pair of flight case castors and an axle off a wooden trolley that was my Fathers. The plan is for the saw to sit higher up in a drip tray for coolant with space beneath for two scrap bins and coolant tank. The rear wheel offset allows the saw to be pushed against the wall and the arm still operate fully and stops the temptation the saw has in wanting to fall over backwards. Currently ratchet strapped to the trolley on chocks of wood to find a comfy working height. It wheels around much easier on the trolley and there will be easily adjusted levelling feet at the castor end as I added a little hotrod rake angle to the trolley for levelling.
Worm & Wheel Gearbox Lubrication.
I noticed in the past couple of months a build up of dirt and oil accumulating on the guide rollers and blade so assume the gearbox seal is weeping. Sure enough on checking the gearbox oil level has dropped a little so I decide it was time to switch over to moly-disulphide grease. Whilst the cover was off I made a sight window for inspecting the gears.

Before.

Add a hardboard template for the plasma cutter.

Deburr and bolt back on with a sheet of Lexan so you can see what's going on inside.
Arm Descent Hydraulic Control.
I have a small bottle jack that I plan to fit on the arm that should work well with a couple of internal modifications to control the arm feed rate. All the parts are there just need the time.
Coolant Pump.
I have a tray sorted and once the trolley and frame is finished a pump may have turned up by then.
Bearings & Setup.
First upgrade almost out of the box was a new set of guide roller bearings which were so tight as supplied one of the bearings cracked. I tried calling Clarke for a replacement under warranty just for the fun of it and they sent a replacement in the post which was too big and so was the next replacement replacement! I gave up and bought some SKF bearing as they are cheap enough and once fitted there was a marked improvement in cutting accuracy. Using the original blade I managed to get good square cuts on tubing and 50mm bar needed very little facing off in the lathe.
Upright Saw Table.
I tried the upright saw table and pathetic support bracket supplied just to say I had. A seat should also be supplied so you can sit on the vice to stop the saw tipping over and being stood straddling the saw to use the table doesn't feel comfortable. I have not used the table since as it flexes too much and the throat depth limits cutting sizes but the blade being held firmly in the rollers does make cutting nice. Off the back of this I collected another used 6x4 saw with the intention of adding a third wheel and straightening the blade to make an upright saw with a better throat depth. I have since obtained an upright wood bandsaw to convert and part refurbished it so that project is on hold at the moment.
Blades & Adjustment.
I bought a better blade as a spare but the original lasted so long I did not replace it for quite a while but the nice expensive new one soon broke once fitted! I repaired the new blade and this highlighted a problem, the blade was now too short for the machine adjustment so I made the machine fit the blade. By making 3 short incisions with a cutting disc I removed a small amount from the machine casing to allow greater adjustment and the reuse of broken blades.
Part of casing removed to allow shorter repaired blades to be used.
Stand & Wheels.
The flimsy stand is let down by a lack of decent feet as the whole machine sits on flexible sheet steel edges which easily fold over if the machine is moved. Very little is needed to improve the stand and stiffen it up but most people replace it in some way to get rid of the laughable plastic wheels. I tried fitting the wheels at either end of the machine and came to the conclusion each time I tried moving the machine with the supplied handle it was going to fall over. There is a knack to moving it I mastered but slowly parts started to pile up to make a better safer set.
This is R&D WIP. I'm Currently altering the height over a period of time to see what height I want, could be years before It's finished!
Lots of 25x25x3 offcuts started to take shape with a pair of flight case castors and an axle off a wooden trolley that was my Fathers. The plan is for the saw to sit higher up in a drip tray for coolant with space beneath for two scrap bins and coolant tank. The rear wheel offset allows the saw to be pushed against the wall and the arm still operate fully and stops the temptation the saw has in wanting to fall over backwards. Currently ratchet strapped to the trolley on chocks of wood to find a comfy working height. It wheels around much easier on the trolley and there will be easily adjusted levelling feet at the castor end as I added a little hotrod rake angle to the trolley for levelling.
Worm & Wheel Gearbox Lubrication.
I noticed in the past couple of months a build up of dirt and oil accumulating on the guide rollers and blade so assume the gearbox seal is weeping. Sure enough on checking the gearbox oil level has dropped a little so I decide it was time to switch over to moly-disulphide grease. Whilst the cover was off I made a sight window for inspecting the gears.
Before.
Add a hardboard template for the plasma cutter.
Deburr and bolt back on with a sheet of Lexan so you can see what's going on inside.
Arm Descent Hydraulic Control.
I have a small bottle jack that I plan to fit on the arm that should work well with a couple of internal modifications to control the arm feed rate. All the parts are there just need the time.
Coolant Pump.
I have a tray sorted and once the trolley and frame is finished a pump may have turned up by then.


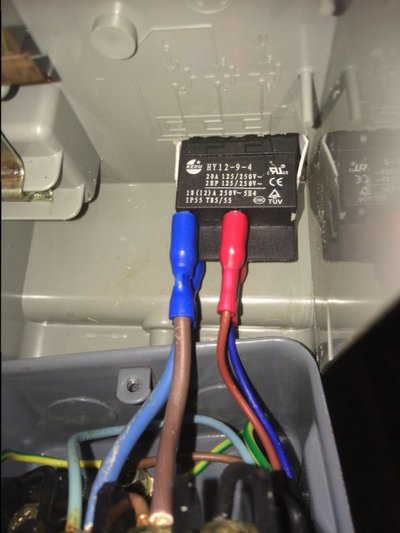
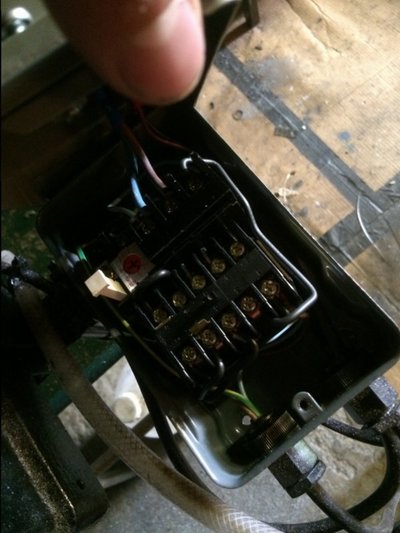
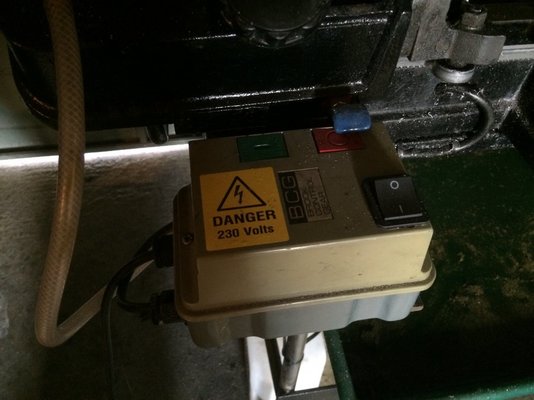
 I'll quite likely copy your idea for a switchable pump wired into the on/off switch but the speed I seem to get round to finishing projects that might be some years away! I was surprised to find out this morning when I fished the spare bearings out that the "some years back" I bought the machine was 2009.
