You are using an out of date browser. It may not display this or other websites correctly.
You should upgrade or use an alternative browser.
You should upgrade or use an alternative browser.
AE86 booter project
- Thread starter Myles1970
- Start date
Myles1970
Member
- Messages
- 921
- Location
- Monaghan, Ireland
Myles1970
Member
- Messages
- 921
- Location
- Monaghan, Ireland
...the white one is quite bad in that there's no bottom edge on either the skin or the inner frame.
I'll probably start with the black (?) one, as it seems to have most of the bottom edge to work to.....I'm quite lucky in having another two doors for reference. Also, there is a swage line about 2 inches from the bottom, so as long as the metal there is fairly solid I can have my cut line about 1/2 inch below that....
I'll probably start with the black (?) one, as it seems to have most of the bottom edge to work to.....I'm quite lucky in having another two doors for reference. Also, there is a swage line about 2 inches from the bottom, so as long as the metal there is fairly solid I can have my cut line about 1/2 inch below that....
jpmillermatic
Member
- Messages
- 1,094
a line where all your cool collectibles reside..... 

kidding......swage, meaning factory body line or feature in a panel....
JP

kidding......swage, meaning factory body line or feature in a panel....
JP
Myles1970
Member
- Messages
- 921
- Location
- Monaghan, Ireland
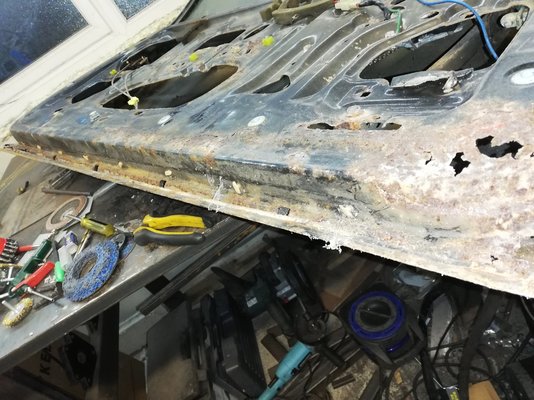
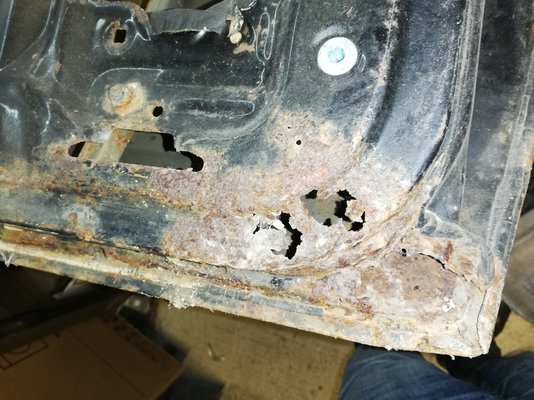
Ok, so the black door needs repairs to the shell on both lower corners, and along the lower edge where it supports the skin there is an area about 20cm long that's rotten through.
The skin, on the other hand, seems quite good. Apart from a couple of small holes at the two bottom corners it seems fairly intact.
So I'm not entirely sure how to tackle it.
My dilemma is that the skin seems ok, but to repair the frame I'm gonna have to grind off the edge to get the skin out of the way. Would I be right in suspecting that where the frame is rough the skin is probably only good (shiny) on the outside.... What would you do? Would you grind off the edge of the skin at only those areas where a repair is required? Or would you whip off the whole bottom edge forcing you to replace the bottom few inches of the skin all the way along? As I type this I'm thinking the latter.... answers on a postcard please

Dcal
Member
- Messages
- 3,986
- Location
- Antrim Northern Ireland
I think you should have a go at fixing it, they are bound to be getting harder to get and it would be a pity to dump them.
The skin will be sealed to the frame with seam sealer so might be better than you think.
Even if the skin is too far gone, I'd repair the frame before starting on the skin to try to preserve the shape.
Before you start, it would be worthwhile taking a couple of templates of any curves in the door and putting a good datum line on the door skin so you can be sure you don’t lose the shape. As you have spare doors this is not as important, but I'd certainly mark a datum. (outside the repair area)
I would cut the frame and try to remove the rotten section of frame a bit at a time and try to save the skin.
If the skin is too far gone you have lost nothing but a bit of time.
So what I would try first is –
Remove any remaining seam sealer and see what you can save.
Clean it up with a wire brush in a grinder to make sure there isn’t a spot weld here or there (there shouldn’t be but you never know)
Cut the frame where you need to, in the minimum number of sections you can get away with.
It is almost certain that there is a slight curve to the door so the frame repair section will need to follow that curve. If you have the kit it’s easy to form the repair section but if not, it’s sometimes easier to make and fit the repair section in smaller pieces to follow the shape of the door.
Cut through the lip of the skin and the frame where it overlaps and skin. Be careful you don't cut through the outside of the skin. I would use a Dremel or similar for the final cut to the skin and frame overlap.
Using a bolster or similar knock the frame up and out leaving the skin intact.
Fix any rust and paint the faces of the skin with weld through primer.
Make and install the repair section.
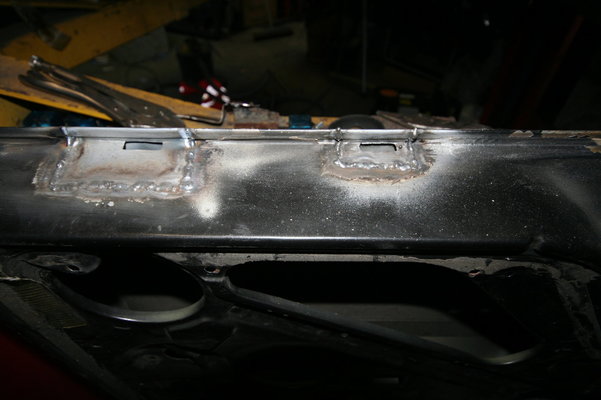
Couple of photos below of a similar but much much smaller repair to a door frame, however the principles the same.
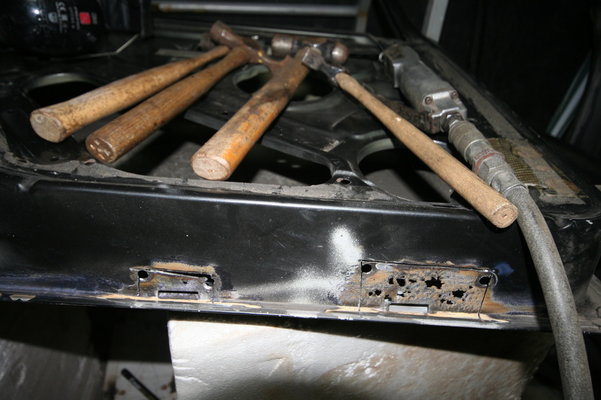
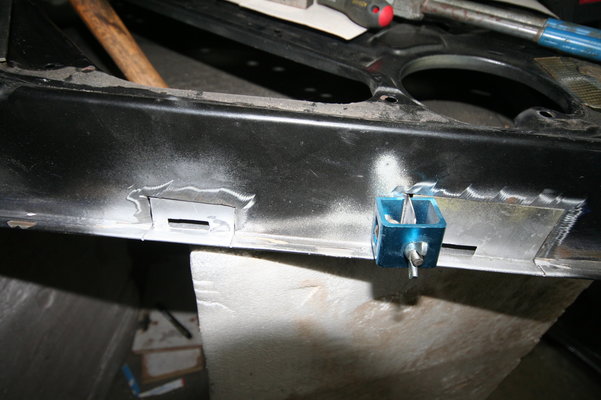


Myles1970
Member
- Messages
- 921
- Location
- Monaghan, Ireland
Quite a detailed response @Dcal , thanks... The parts of the frame that are rotted out are quite complex, would you suggest repairing piece by piece? Or would you make templates for 3-4 pieces and weld them together before sticking them on as one (or two) unit(s)? Looking earlier I could make up one section from three pieces before I get near the door skin...
As for a datum, could I use the lower swage line? It's about 4" from the bottom edge
As for a datum, could I use the lower swage line? It's about 4" from the bottom edge
Dcal
Member
- Messages
- 3,986
- Location
- Antrim Northern Ireland
Making it up in three bits would be a good idea, you can weld it together and dress it on the bench while checking it against the door and do a finial tweak or two before fitting.
Or if you put, say the middle section in first it will really tighten up the door before working with the more complex ends.
Keeping the skin in one piece (even if it’s frilly) helps keep you honest because it easy to make a great repair piece that's very slightly off.
Having a something to work to really helps get it bang on.
The swage line sounds like a good reference, however it’s sometimes hard to get a repeatable measurement against a fold line. Probably only a mm or two but it all adds up.
I would scribe a straight line close to the swage but a set distance from the bottom of the door so you have something definite.
Myles1970
Member
- Messages
- 921
- Location
- Monaghan, Ireland
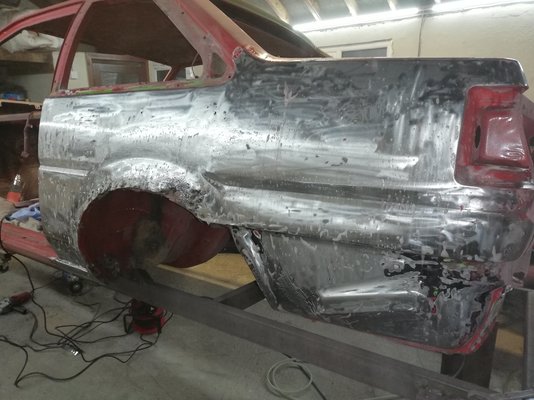
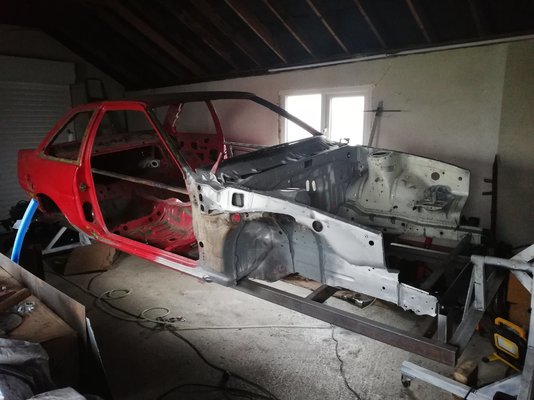
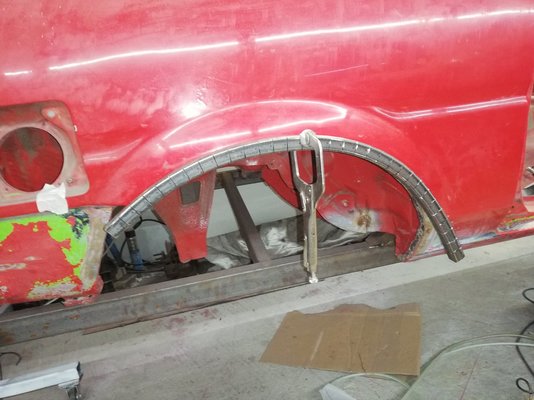
While I was there today I thought I'd have a look at the passenger quarter panel. I knew from before that the arch needed work, but I also suspected that there'd be more damage underneath. So I opened up a can of Rust-oleum paint stripper and got to work. 5 hours later the result is as the picture above. If you have a look at the video
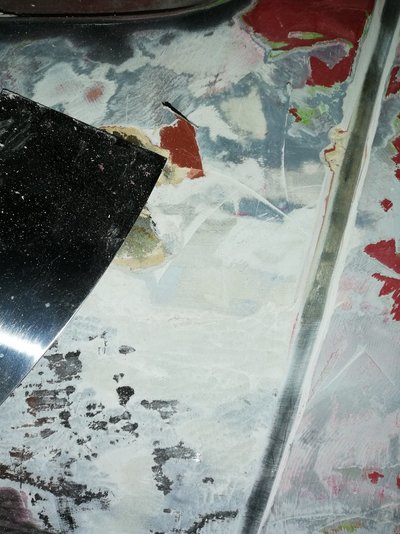
Two that I can make out: the car was originally red, then green and then bright red. With minimum two layers of filler. This panel has taken a battering, and there's two holes drilled; I'm guessing that they were for over-fenders as I can't see evidence of any creases that high on the panel. Creases? They're lower down, between the wheelarch and the door shut. As I've got wheelarch extensions, I'm not that worried about the arch, as I'll be cutting it off anyway... But I'm going to have to add some filler as there's a few high and low spots above the wheel
jpmillermatic
Member
- Messages
- 1,094
Tell me if this makes any sense. The lower corner of the inner doors in black look rotted, but the same area looks good on the white doors. if this is the case, you may be able to graft the good section in....at least that would save you some time. Im not sure if there are any other sections where this is possible.
JP
JP
Myles1970
Member
- Messages
- 921
- Location
- Monaghan, Ireland
Hi @jpmillermatic , although I have 2 pairs of doors one pair is completely rust free. It's the other pair that I'm trying to salvage (instead of just dumping them). Thanks tho
Myles1970
Member
- Messages
- 921
- Location
- Monaghan, Ireland
Right, made a start on one of the doors:
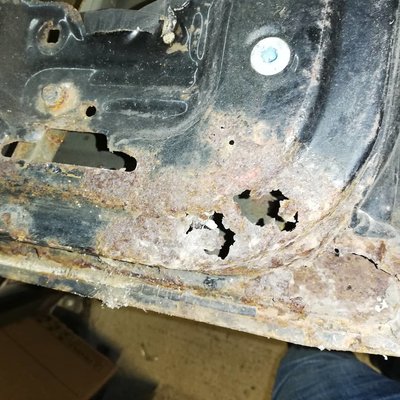
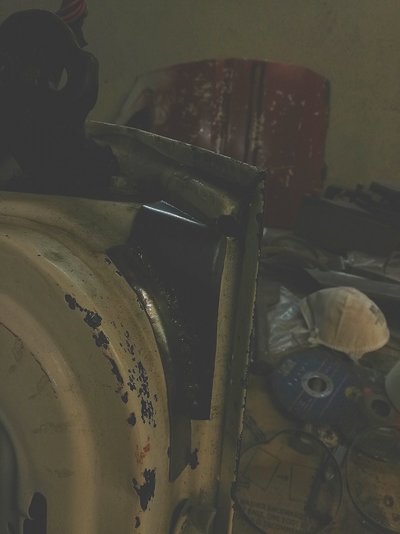
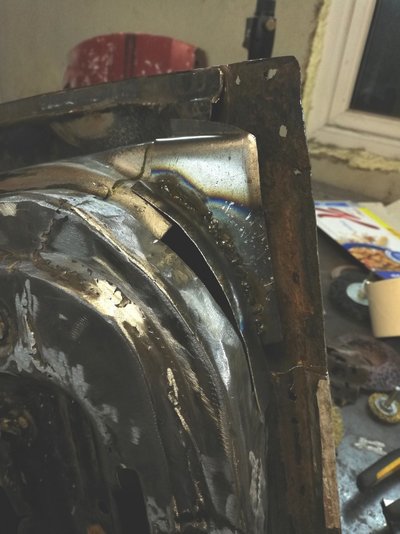
... there's quite a few repairs required on this door, and I think this bottom corner is probably the worst...so I the sensible thing would be to leave it until after I do a few of the more straightforward ones (which I obviously didn't

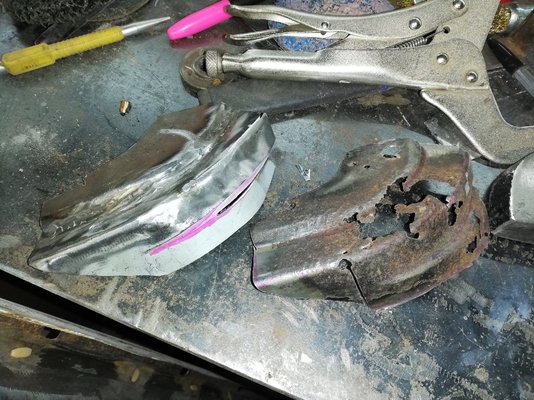
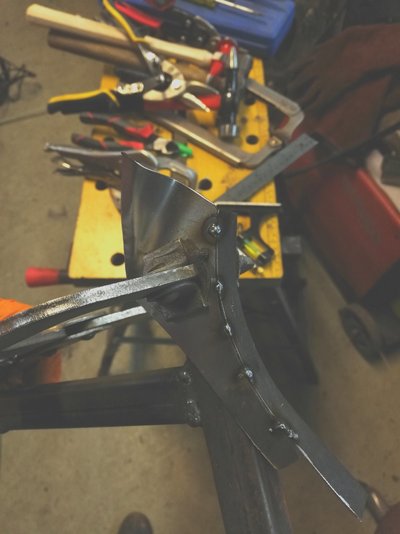
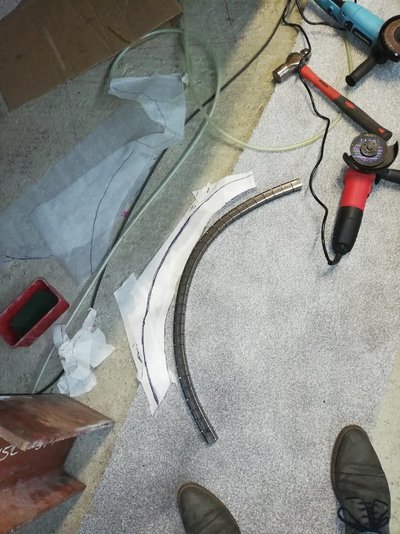
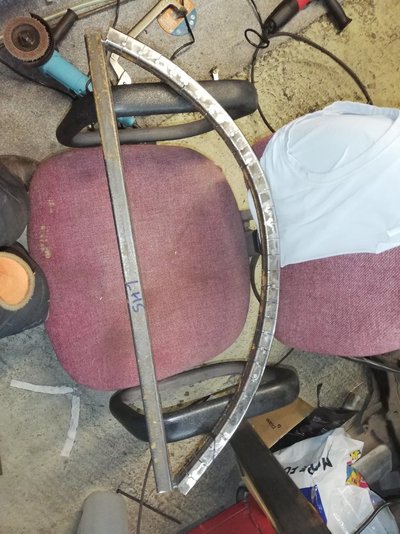
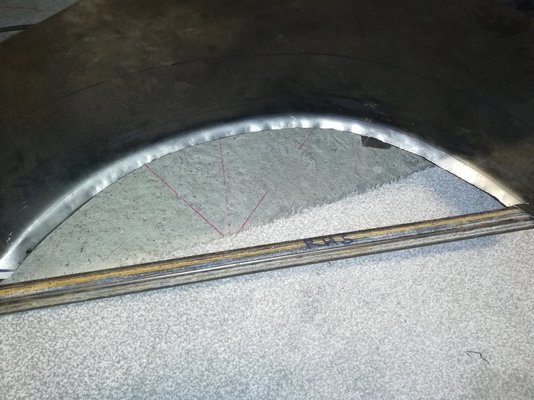
So above right, you can see the piece that I've cut off with an airsaw; I'm starting to get the swing of it and I like the fine cuts it leaves. Above left is the (nearly) finished piece...made from 3 patches using masking tape to make up the templates...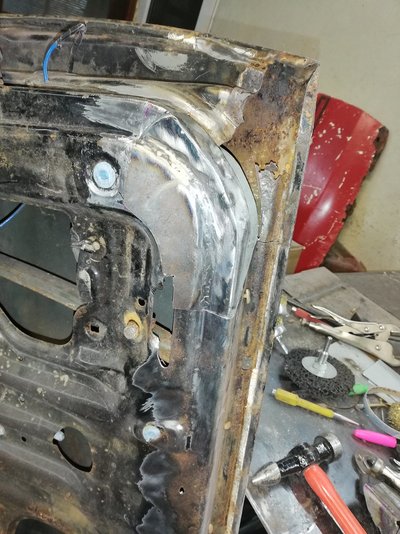
I think it looks better in the pics than in the flesh , and will require some 'fettling' to weld in.
After it's finished I intend making a patch for the skin, and finally another repair section for the lower edge of the shell...

... there's quite a few repairs required on this door, and I think this bottom corner is probably the worst...so I the sensible thing would be to leave it until after I do a few of the more straightforward ones (which I obviously didn't


So above right, you can see the piece that I've cut off with an airsaw; I'm starting to get the swing of it and I like the fine cuts it leaves. Above left is the (nearly) finished piece...made from 3 patches using masking tape to make up the templates...

I think it looks better in the pics than in the flesh , and will require some 'fettling' to weld in.
After it's finished I intend making a patch for the skin, and finally another repair section for the lower edge of the shell...
Myles1970
Member
- Messages
- 921
- Location
- Monaghan, Ireland
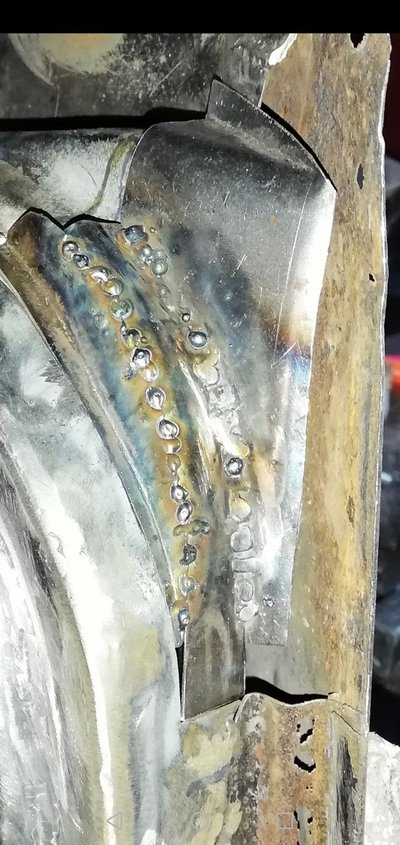
Ok, so after a coat of weld-thru primer, I've welded the first section in. The two grey/pink pieces that appear to be sticking 2 fingers up at me will be dealt with ..... later...
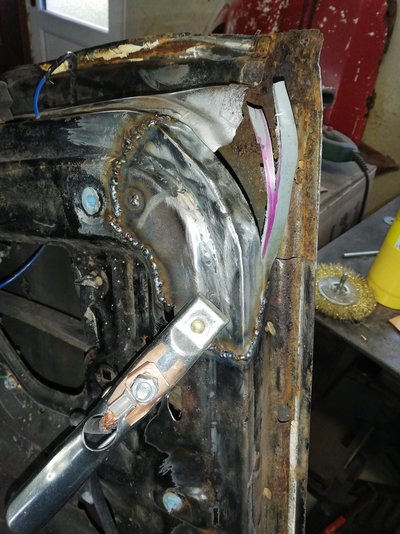
...the welds ground down...
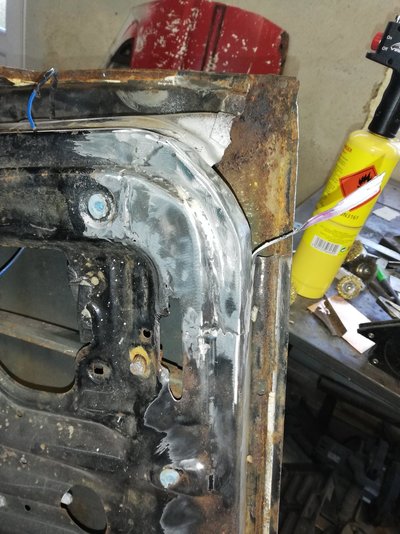
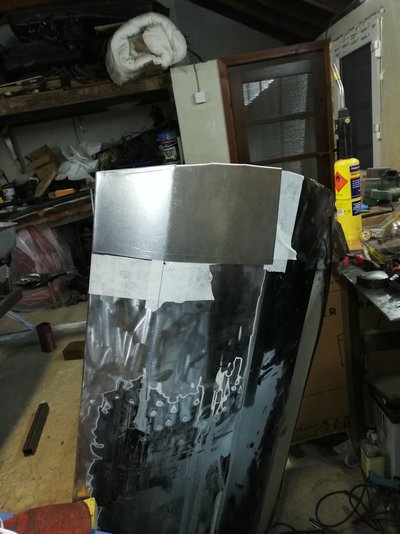
And below is the patch for the skin. I pre-formed the edges over a length of 0.8mm sheet. In hindsight, I might have been better bending it over something thicker; 1.0 or 1.2 ... Then I could've test fitted it as required, saving the final 'pinch' for when the repair is finished..... Instead, I've overtightened it and added a low area along the bottom of the door as can be seen in the bottom pic ...
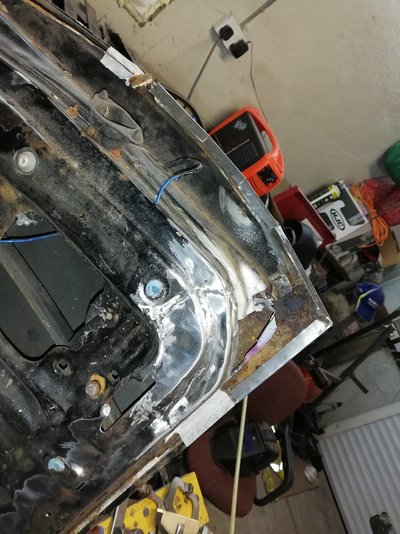
See the distortion just inside the edge, ah well... it's not the end of the world

...the welds ground down...

And below is the patch for the skin. I pre-formed the edges over a length of 0.8mm sheet. In hindsight, I might have been better bending it over something thicker; 1.0 or 1.2 ... Then I could've test fitted it as required, saving the final 'pinch' for when the repair is finished..... Instead, I've overtightened it and added a low area along the bottom of the door as can be seen in the bottom pic ...

See the distortion just inside the edge, ah well... it's not the end of the world


jpmillermatic
Member
- Messages
- 1,094
Now that seems like a better way to be sure the piece keeps its shape.....
looks great.
JP
looks great.
JP


