daedalusminos
Member
- Messages
- 2,426
- Location
- Norwich
Next you take the segment you extruded down with a taper and create another rotary pattern of 6...

Hardest part to my mind is measuring it accurately, but I'm always looking for an excuse to buy a toolmaker's microscope.
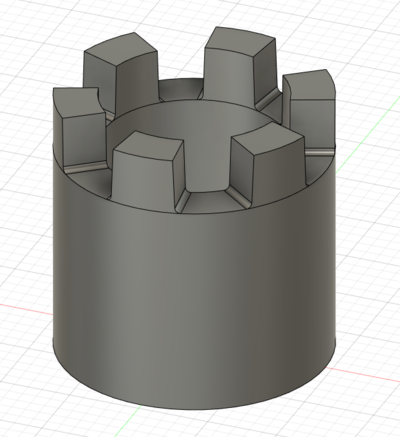
The teeth on the original don't look tapered to me but if they are, I'd draw the profile at the base of a tooth, create a plane offset the height of the tooth from that surface and draw the profile at the top, then "Loft" a surface between them.
View attachment 244889
Then use a circular pattern to create however many teeth there are.
That method will taper the outer edge of the tooth too, and you have to manually calculate that taper angle.Select the segment and extrude it down and taper by the calculated taper angle (2.434 degrees) - and create a new body
View attachment 244927


Erm no it won't since it's used to cut the ring....calculating the angle takes 10secsThat method will taper the outer edge of the tooth too, and you have to manually calculate that taper angle.
Yes I didn't realise you were doing it that way when I started replying.Erm no it won't since it's used to cut the ring....calculating the angle takes 10secs

I'd be wondering if a plastic part might even actually work in this circumstance. I certainly would't think something so small and fiddly would be that easy to cast anyway. Plus of course you would still need to machine a cast part.
Why not go full "Clickspring" mode and fabricate from brass? Turn most of it on a lathe, cut the teeth with a hacksaw and file it to perfection?
For extra man points, make your own files...
even if you cast it , its still going to need finishing ,,, why not just finish it , to start with , or is it more about the challenge now than the part ,,, the few things I've had cast for me have taken longer to fettle than if i'd just made them ,, watching now with interest.
Stupid suggestion but you can't glue the broken one back together and use that for the casting?

Could you glue the part back together (superglue?), and take a mold from it? (Latex, or (100%) silicone sealant [1])
Then do a lost wax cast?
[1] water + washing up liquid in a bowl, empty sealant into it, and knead under the water. It sort of turns into a "putty" that wont stick to stuff(except itself) and will cure even in thick sections.
It *has* to be 100% silicone though.
Gluing it up is not an easy option , when it split the end of the four foot long driven shaft walloped one broken side harder than the other & bent it some 8 mm out of a true circle as it tore free and bust the thing apart .

That method will taper the outer edge of the tooth too, and you have to manually calculate that taper angle.
Here's what I got from the given dimensions;
View attachment 244924 View attachment 244926
And the timeline:
View attachment 244931
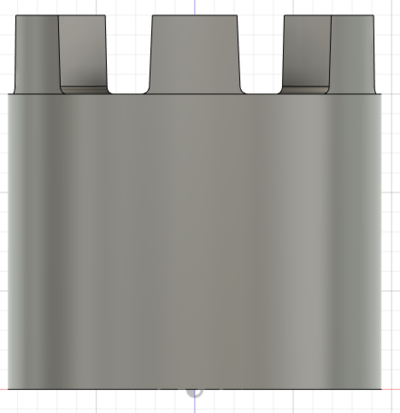
That's a sketch for the cylindrical body, extrude the length, sketch of the bottom tooth profile, offset construction plane, sketch for the top profile, loft between them, fillet either side and then a circular pattern to make the other five.
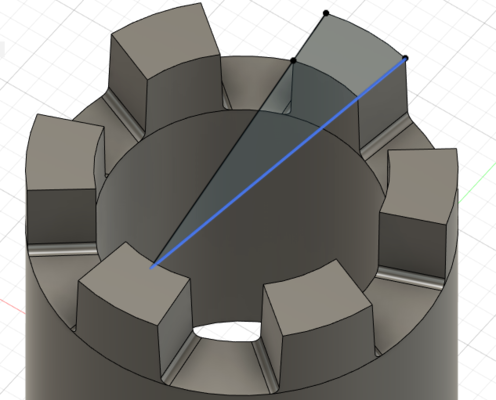
Also, everyone's drawing the sides of the centre of the cylinder but the measurements given don't actually fit that;
View attachment 244935
Though that does strike me as a weird profile, I wouldn't be surprised if the actual part does line up with the center and Dapph's measurements are off a touch, just thought it was worth pointing out. EDIT: Sort of restating what Sako said, but his message hadn't come through when I posted.
EDIT No.2; Didn't notice it was double ended either.
Doesn't that make it symmetrical about the centre?so the black line in your drawing should be on the right edge of the bottom tooth & the blue line crosses over the black line soit goes to the left side of the bottom of the tooth . That should give the angle of the tooth
Yes , it appears to beDoesn't that make it symmetrical about the centre?
Can you get a photo of one of the broken teeth inbetween the two of the teeth?

