- Forums
- Tools, Compressors and Metal Coatings
- Tools, Materials and Techniques
- Machining
- Lathes and other Machining Equipment
You are using an out of date browser. It may not display this or other websites correctly.
You should upgrade or use an alternative browser.
You should upgrade or use an alternative browser.
South Bend Heavy 10
- Thread starter Pete.
- Start date
Pete.
Member
- Messages
- 14,832
- Location
- Kent, UK
Thanks Tigman.
Had a bit of a hiccup tonight - I realised that I didn't have a reference surface for printing the dovetails. I did have a small straight edge I was using but I loaned that out. I do have a 12" camelback that I bought as a casting bu tI only ever got around to scraping the base of that, which is useless for the dovetail way, I need the top of the dovetail which is not scraped-in.
So I knock up a jig to hold it for scraping and set to it. Scraping a straight edge takes a lot more time than a machine way because you have to make a much better job of it - it's your reference surface after all. I found that the dovetail was turned down slightly at the ends as you can see here.
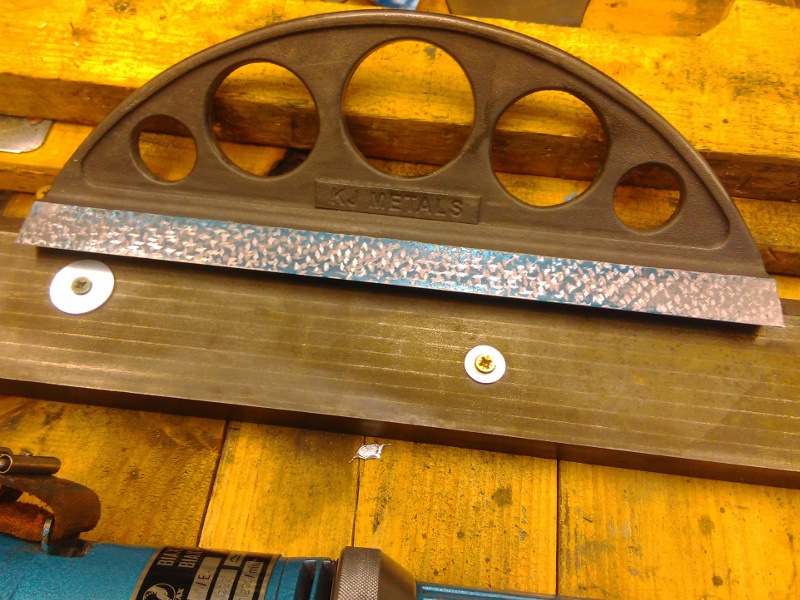
So 40 minutes of power scraping and it's looking a lot better, but even with a heavy print it's showing the ends are still low.
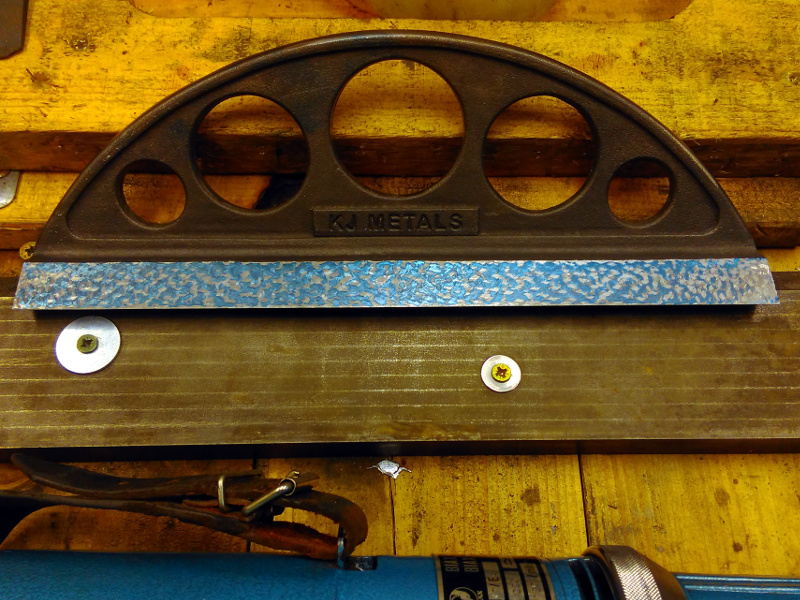
And half an hour later it's looking a lot better. I've switched to using stuarts micrometer blue because it gives a darker print when you put it on thin, which you need to do for a straight edge - I couldn't see the canode applied thinly because of the glare from my lights.
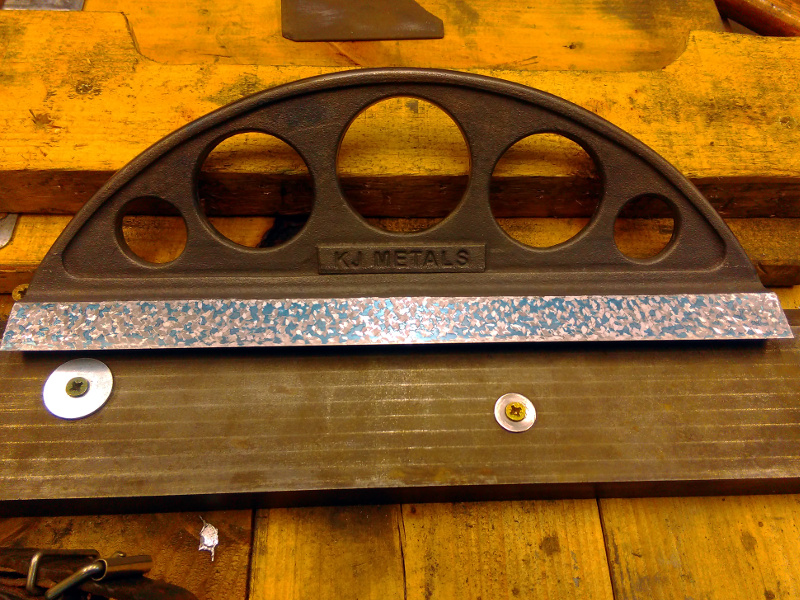
And half an hour later I have it good enough to start bluing the dovetails.
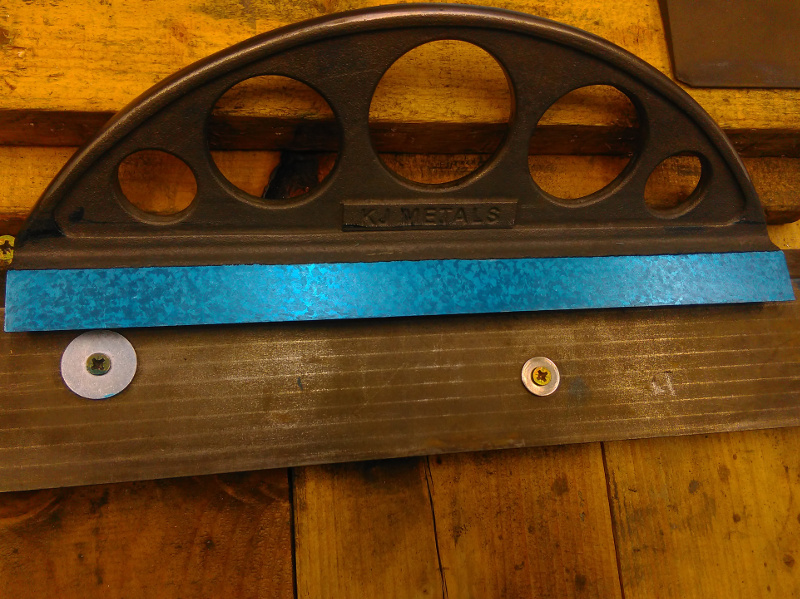
Had a bit of a hiccup tonight - I realised that I didn't have a reference surface for printing the dovetails. I did have a small straight edge I was using but I loaned that out. I do have a 12" camelback that I bought as a casting bu tI only ever got around to scraping the base of that, which is useless for the dovetail way, I need the top of the dovetail which is not scraped-in.
So I knock up a jig to hold it for scraping and set to it. Scraping a straight edge takes a lot more time than a machine way because you have to make a much better job of it - it's your reference surface after all. I found that the dovetail was turned down slightly at the ends as you can see here.
So 40 minutes of power scraping and it's looking a lot better, but even with a heavy print it's showing the ends are still low.
And half an hour later it's looking a lot better. I've switched to using stuarts micrometer blue because it gives a darker print when you put it on thin, which you need to do for a straight edge - I couldn't see the canode applied thinly because of the glare from my lights.
And half an hour later I have it good enough to start bluing the dovetails.
Pete.
Member
- Messages
- 14,832
- Location
- Kent, UK
I've been meaning to finish it for ages so this has given me the impetus to get it done.
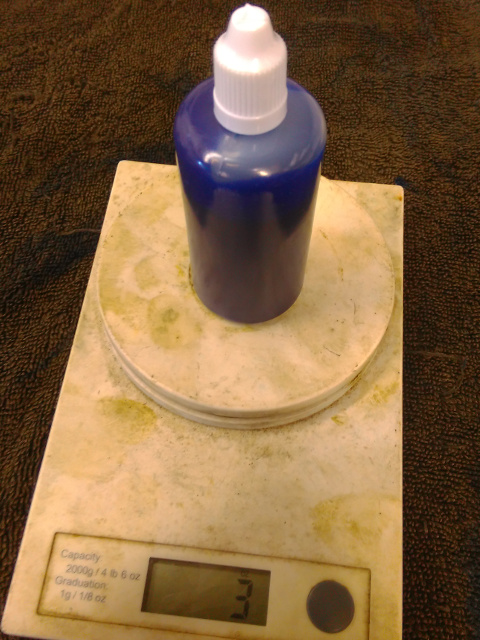
I got a shock today when I got home to find my huge bottle of spotting blue waiting for me. Just over 32hrs from ordering to delivery from California is impressive. Got some small bottles coming too. I had one left over from when I bought some for the scraping class. Handy little bottles I have to say.
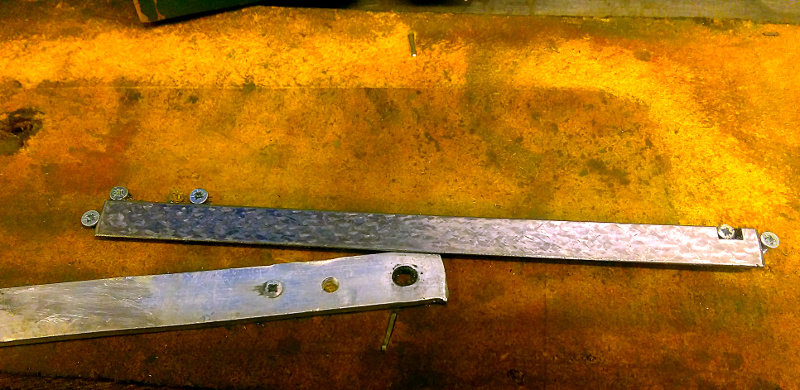
Scraping the cross-slide gib strip today. These are notoriously difficult to hold for scraping so I got an old scrap of MDF and made a little jig from some small screws and a strip of scrap ally. The flat ally bar just holds it from rocking backwards when it's being scraped. It has to be quickly removable for spotting on the flat plate but the taper and angled edges mean you can't hold it in a vice.
I got a shock today when I got home to find my huge bottle of spotting blue waiting for me. Just over 32hrs from ordering to delivery from California is impressive. Got some small bottles coming too. I had one left over from when I bought some for the scraping class. Handy little bottles I have to say.
Scraping the cross-slide gib strip today. These are notoriously difficult to hold for scraping so I got an old scrap of MDF and made a little jig from some small screws and a strip of scrap ally. The flat ally bar just holds it from rocking backwards when it's being scraped. It has to be quickly removable for spotting on the flat plate but the taper and angled edges mean you can't hold it in a vice.
Pete.
Member
- Messages
- 14,832
- Location
- Kent, UK
Well, the bottle of scraping blue I bought turned out to be from a bad batch but I'm having a bit of a hard time getting it replaced (or geting the manufacturer to concede that there's even anything wrong), so I've stripped the apron down. There's not much to see, everything is in great condition apart from the paintwork but some of the bits are a very awkward shape to paint-strip (and other bits like the flip-cap oilers are too delicate) so I've adopted a method I've used before.
I stripped off all the bits and wrapped them in scott workshop paper towel soaked in brake cleaner. Stuffed them all in a plastic bucket andsealed them in loosely with a carrier bag.

Next day I got them all un-wrapped and the brake cleaner has lifted all the paint off nicely. Most of it rubes off with your glove and the stubborn bits just need a lick with a wire brush. HEre's the bits straight out of the bucket.
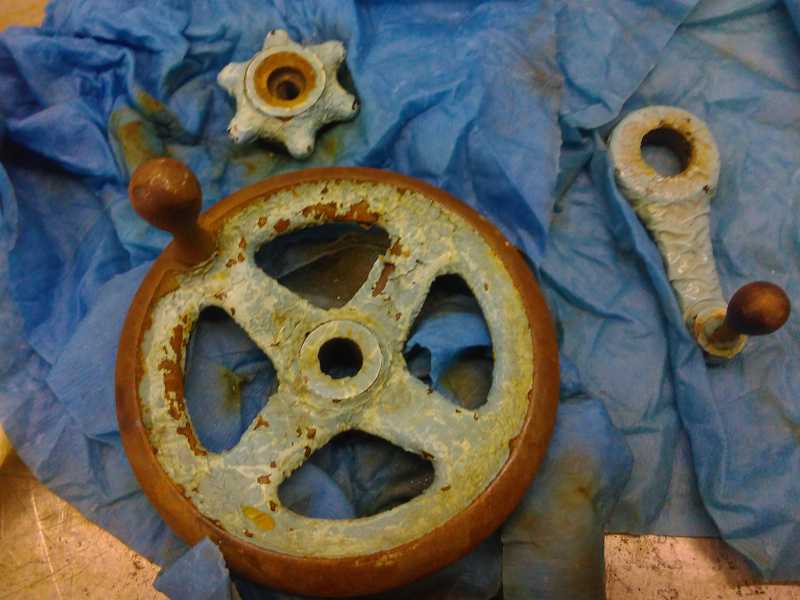
And 5 minutes later
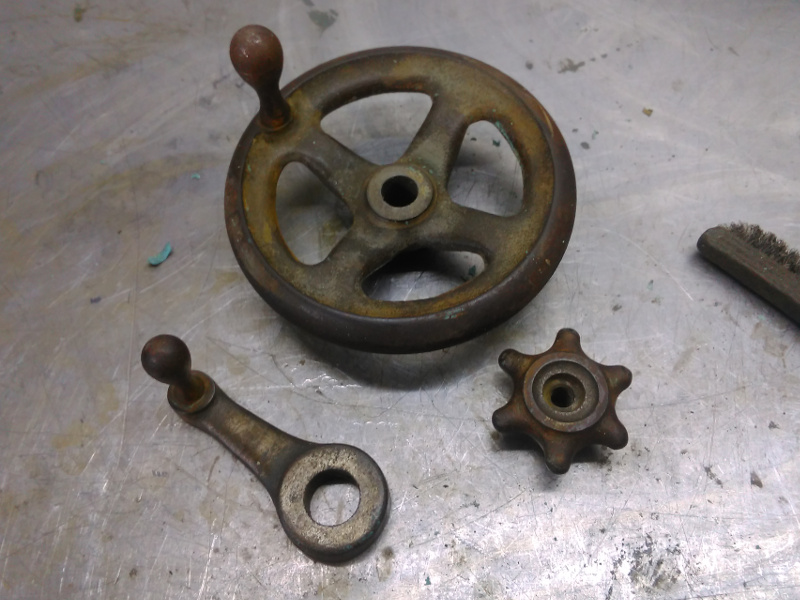
I stripped off all the bits and wrapped them in scott workshop paper towel soaked in brake cleaner. Stuffed them all in a plastic bucket andsealed them in loosely with a carrier bag.
Next day I got them all un-wrapped and the brake cleaner has lifted all the paint off nicely. Most of it rubes off with your glove and the stubborn bits just need a lick with a wire brush. HEre's the bits straight out of the bucket.
And 5 minutes later
slim_boy_fat
Member
- Messages
- 29,532
- Location
- Scottish Highlands
A Dickson-type tool post for the Heavy 10.
Hope you'll be replacing that mismatched screw.
Pete.
Member
- Messages
- 14,832
- Location
- Kent, UK
Hope you'll be replacing that mismatched screw.
Not now I know it bothers someone...

Pete.
Member
- Messages
- 14,832
- Location
- Kent, UK
So, other jobs I have done in the past couple of weeks. Cross slide screw and nut. Original is 7/16 -10TPI LH acme. I drilled it out and tapped it for the new 1/2" screw I made.
Found a close-fitting drill for the old thread and loaded the nut onto it. This was so I would know that the new hole was on axis and at the right height.
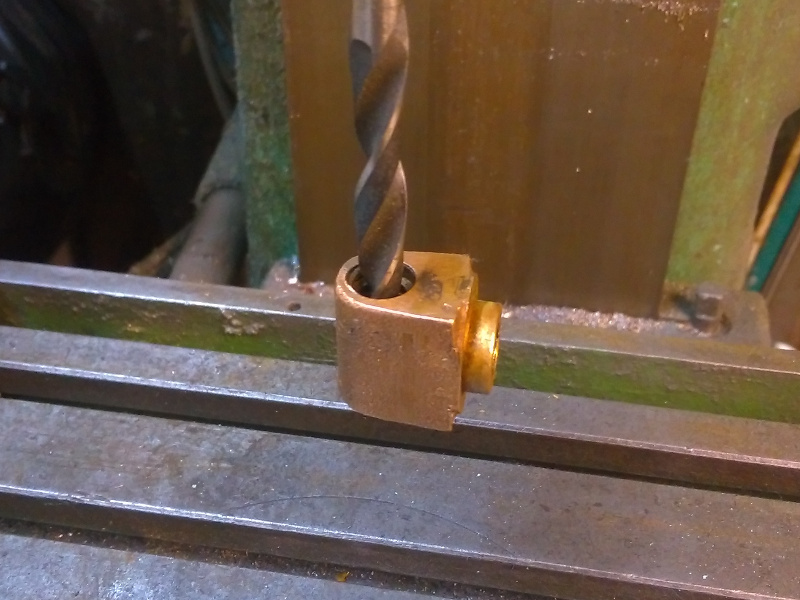
I lined up my milling chuck and got it clamped up whilst on the drill, with a washer under the nut to space it off the jaw and keep it square. Then I drilled and tapped it 1/2" 10TPI left hand.
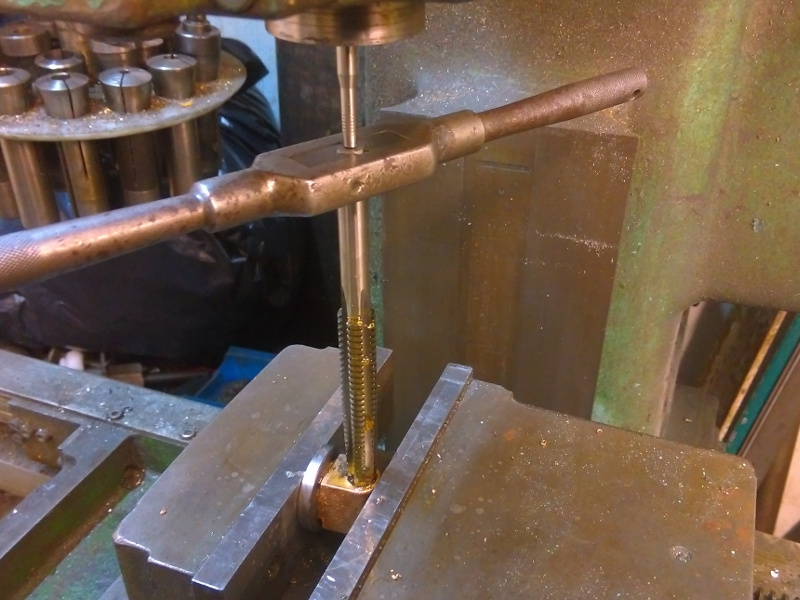
Found a close-fitting drill for the old thread and loaded the nut onto it. This was so I would know that the new hole was on axis and at the right height.
I lined up my milling chuck and got it clamped up whilst on the drill, with a washer under the nut to space it off the jaw and keep it square. Then I drilled and tapped it 1/2" 10TPI left hand.
Pete.
Member
- Messages
- 14,832
- Location
- Kent, UK
Now a cross-slide screw. The lathe has powered cross-feed so the screw has a gear made integral to it. I had to think how to re-produce that but got there ok in the end.
First I turned down a blank from EN8 leaving a bit of meat up at the dial end (reason why later).
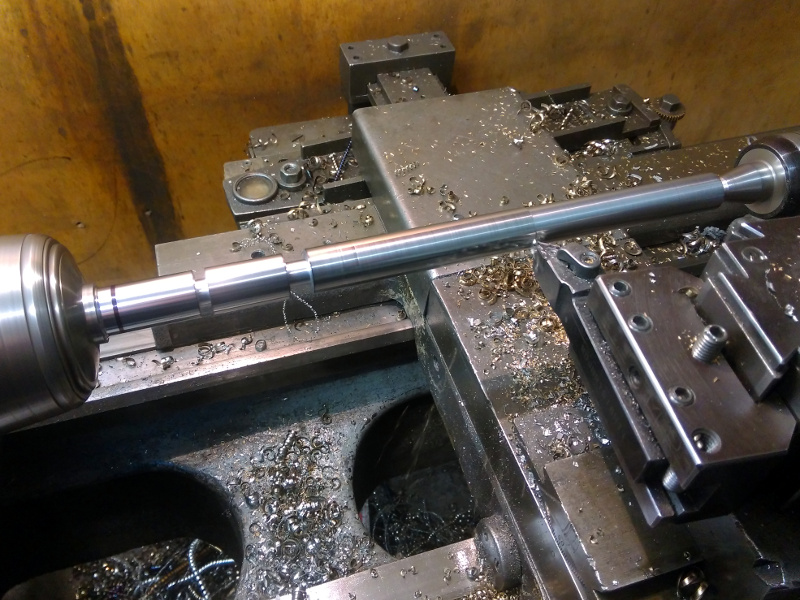
Ran a test-cut with a marker pen, as I always do, just to make sure I had the right pitch set.
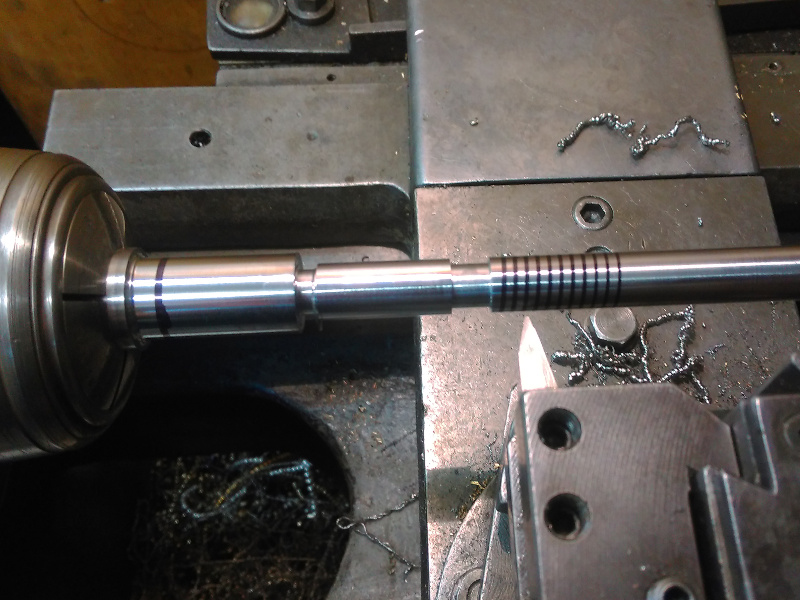
Then I cut the thread left to right with my HSS cutter. I have to admit I struggled with the profile despite careful grinding so I've since bought a threading insert and holder for future use. Anyway, I finished this thread with a new die for a good fit in the nut.
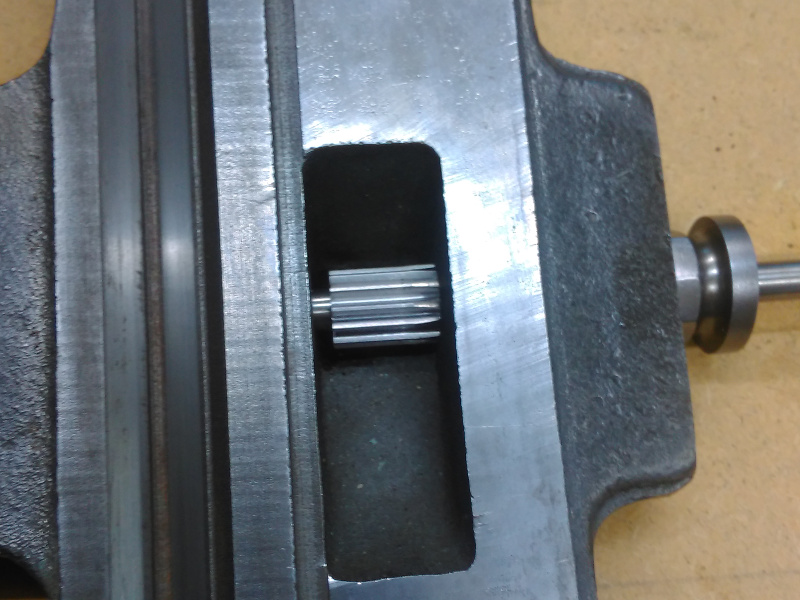
Next to cut the gear. My hobber uses a particular taper and you load the blanks onto an arbor to cut the teeth. Since I this gear was integral I needed to load the whole screw onto the hobbing machine. The through hole is 10mm but the screw is 3/8 at the dial end so would pass right through. All I had to do was turn the 3/8" section and turn the taper onto the section I left in so it would drive directly off the spindle. I didn't have enough space for a centre so I used a ball bearing on the end for support.
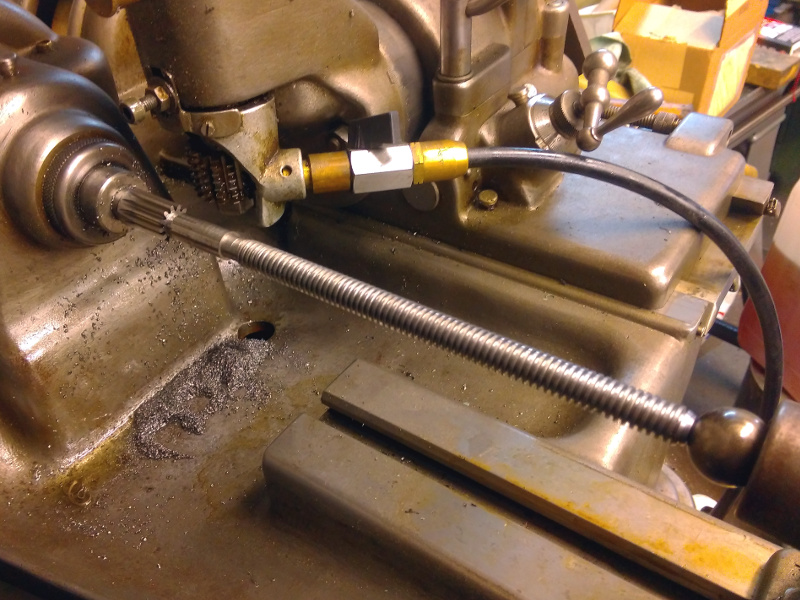
Here's the gear close-up. You'll see that the cutter ran into the plain section but it's not on any bearing face so it doesn't hurt. If I had thought about it I could have avoided by taking a roughing pass but this is the first one I've made.
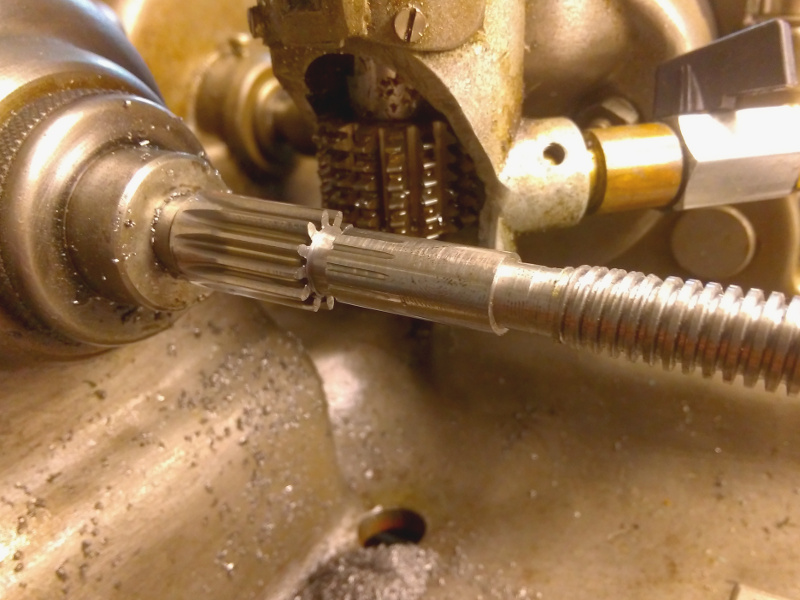
Here's the taper I turned on the screw to drive it in the hobber. I since turned this off square.
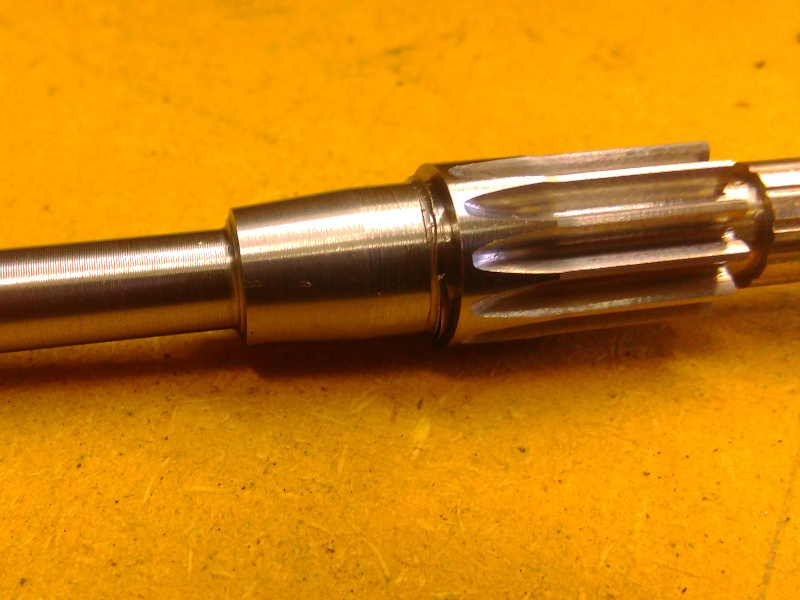
New screw compared to the old one. The long end is to allow for the big dial conversion - coming next.
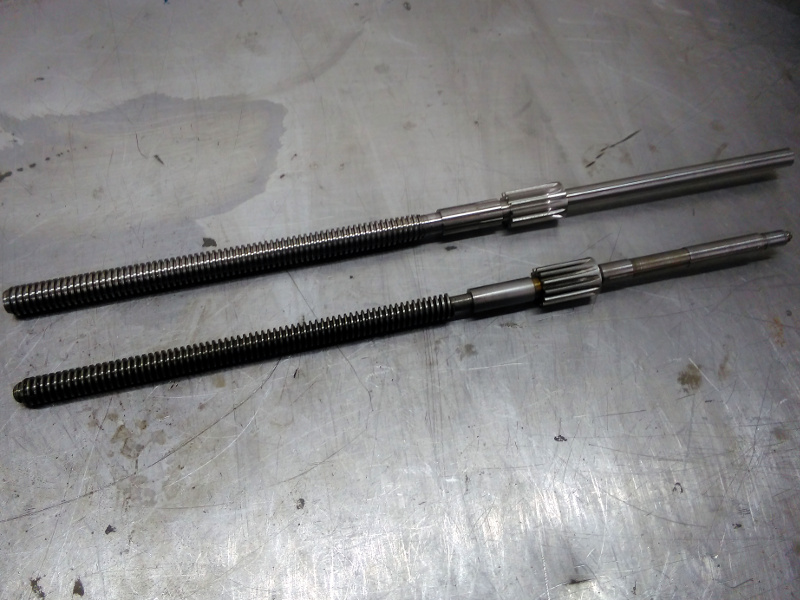
Gear lines up nicely for the cross-feed. All that's left is to modify it slightly for the thrust bearings I have ordered.
First I turned down a blank from EN8 leaving a bit of meat up at the dial end (reason why later).
Ran a test-cut with a marker pen, as I always do, just to make sure I had the right pitch set.
Then I cut the thread left to right with my HSS cutter. I have to admit I struggled with the profile despite careful grinding so I've since bought a threading insert and holder for future use. Anyway, I finished this thread with a new die for a good fit in the nut.
Next to cut the gear. My hobber uses a particular taper and you load the blanks onto an arbor to cut the teeth. Since I this gear was integral I needed to load the whole screw onto the hobbing machine. The through hole is 10mm but the screw is 3/8 at the dial end so would pass right through. All I had to do was turn the 3/8" section and turn the taper onto the section I left in so it would drive directly off the spindle. I didn't have enough space for a centre so I used a ball bearing on the end for support.
Here's the gear close-up. You'll see that the cutter ran into the plain section but it's not on any bearing face so it doesn't hurt. If I had thought about it I could have avoided by taking a roughing pass but this is the first one I've made.
Here's the taper I turned on the screw to drive it in the hobber. I since turned this off square.
New screw compared to the old one. The long end is to allow for the big dial conversion - coming next.
Gear lines up nicely for the cross-feed. All that's left is to modify it slightly for the thrust bearings I have ordered.
God mode restorations
Member
- Messages
- 8,156
- Location
- uk colchester
Very nice Pete. That gear hobbler is awesome.
Pete.
Member
- Messages
- 14,832
- Location
- Kent, UK
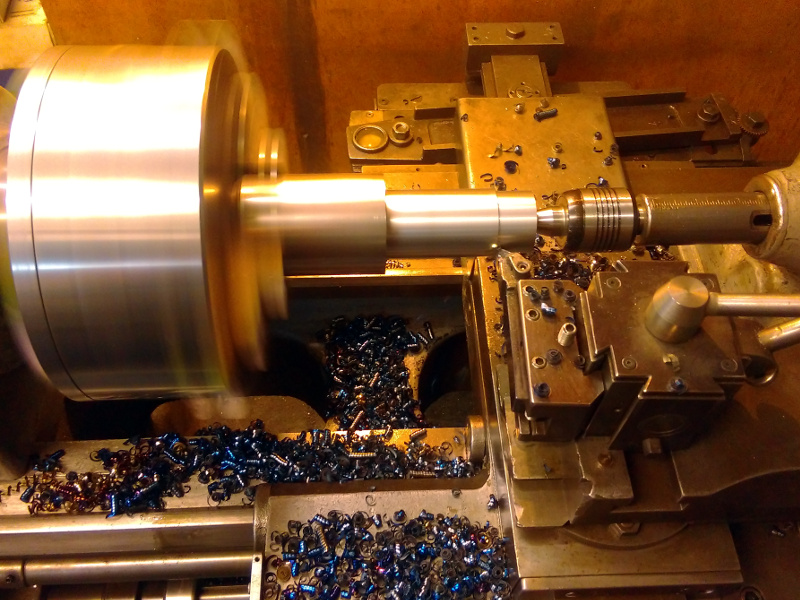
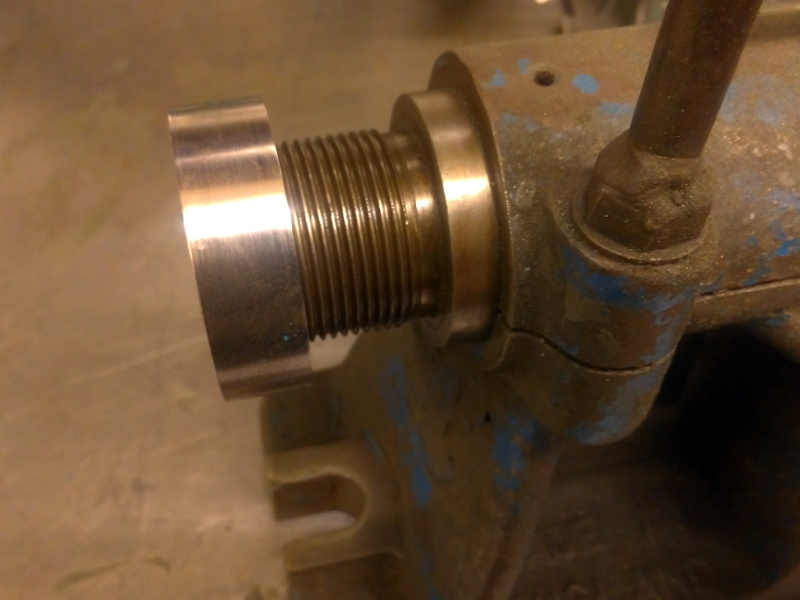
Cross-slide big dial conversion. The dial on the South Bend is the old-style small dial (it's from 1943 after all). Later machines had a bigger dial on them and it's quite easy to make one but the cross-slide is supposed to slide back over the dial so if you fit a bigger one it stops the slide about 30mm short. Not such a big issue but for sure some day it'll be 30mm that someone needs, hence the longer shank on the screw above.
I turned a chunk of steel down. Filled my chip pan with little blue curly chips.
After that I cut a very odd sized thread in the end to screw it in - 25/32" - 16tpi. It;s an odd size to allow the gear on the screw to pass though the thread it screws into. No photo of this, sorry.
Then I turned the numbers dial from the same piece of 60mm stock. Put a small register on it to hold it concentric on my dividing head and tapped a central hole for a holding thread.
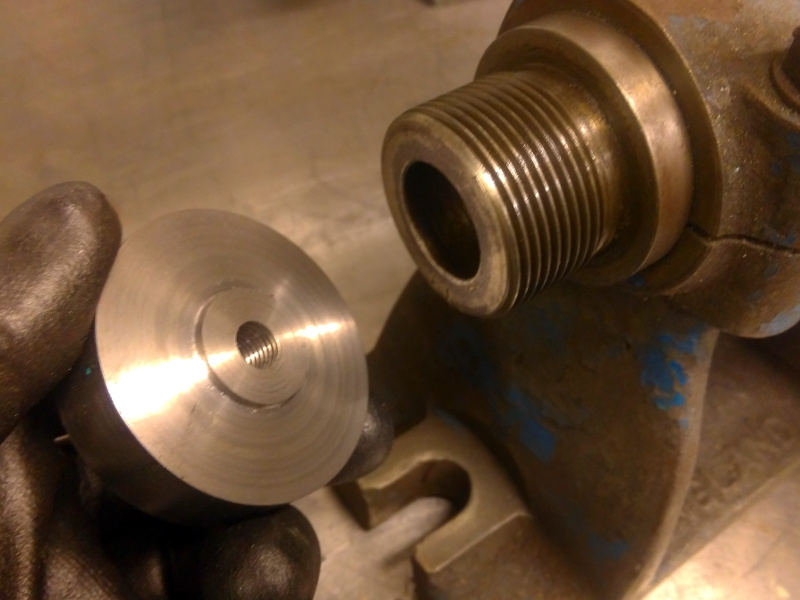
The original dial was 100 graduations for the 10TPI screw. Each thou on the dial is 1 thou of movement. Another way of doing it is to make the dial 'diameter reading' by doubling the diameter (what I am doing) and the number of graduations. This means that 1 thou on the dial removes 1 thou off the diameter. It effectively doubles the resolution. My dividing head is 40:1 ratio so 40 turns on the handle = 1 turn of the part. I need 200 divisions so I had to split each handle turn into 5 positions. I got a plate with 20 holes and taped it over (to reduce the risk of mistakes then marked 5 holes with marker pen. Red for one hole (the 10's and 5's and green for the others (the 4 little marks in between).
The pictures show it better. Here I'm using one (red) hole to cut the tens first then the 5's. I did one lap taking 2 turns at a time to cut the long ones then skipped a turn and did the same for the short marks. Less chance of making a mistake that way.
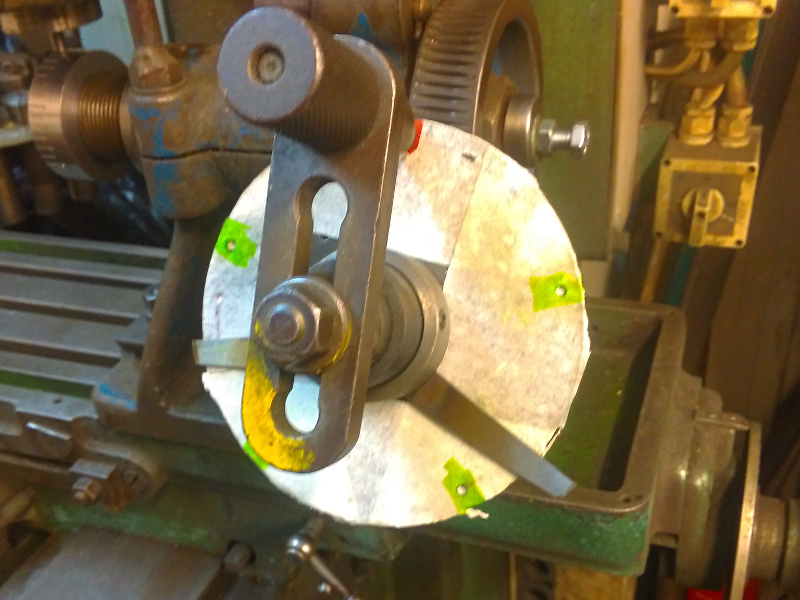
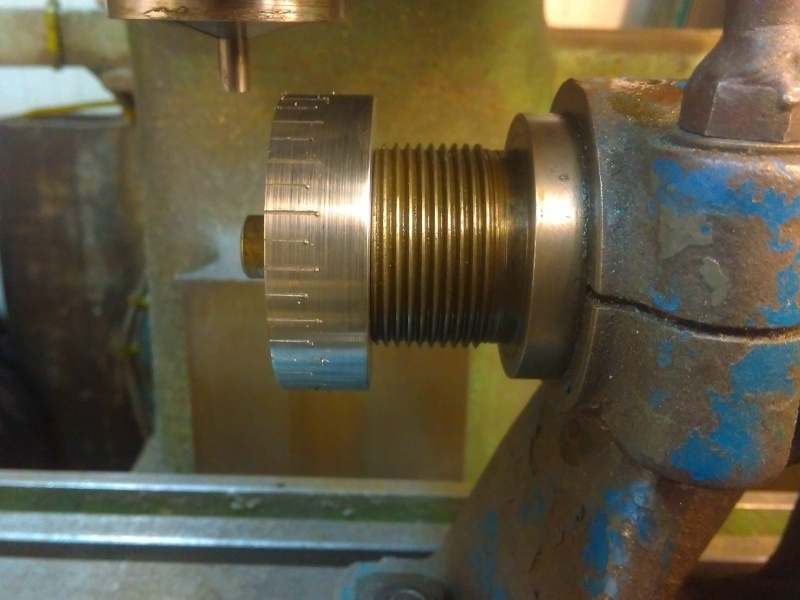
Then I shortened up the stop and used the green marks to cut the 1,2,3,4 divisions in between.
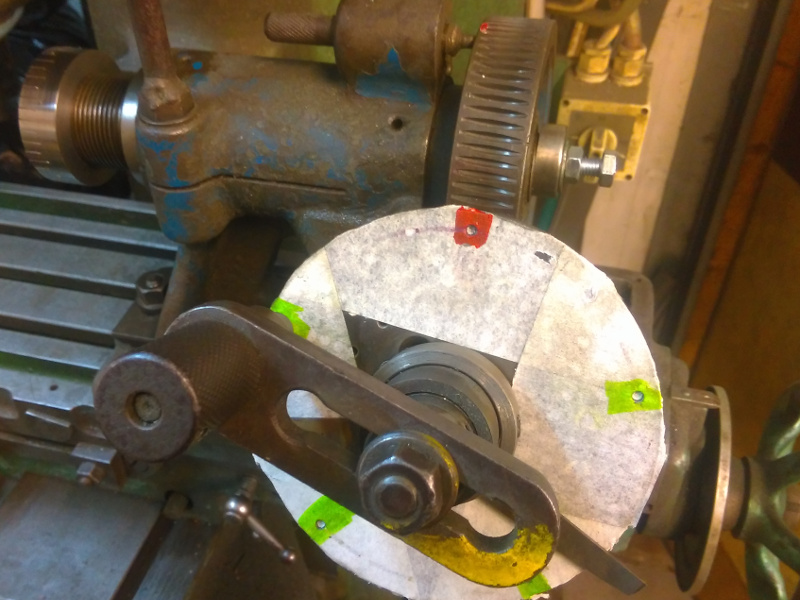
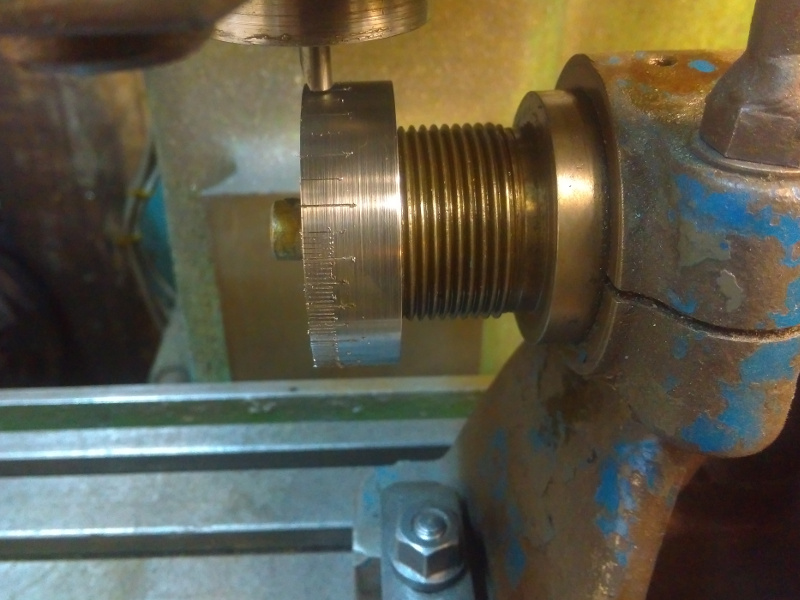
The marks came out really nice, but ever so slightly shallower one side than the other. Not even noticeable but this caused me a problem later. Here's the dial and screw together.
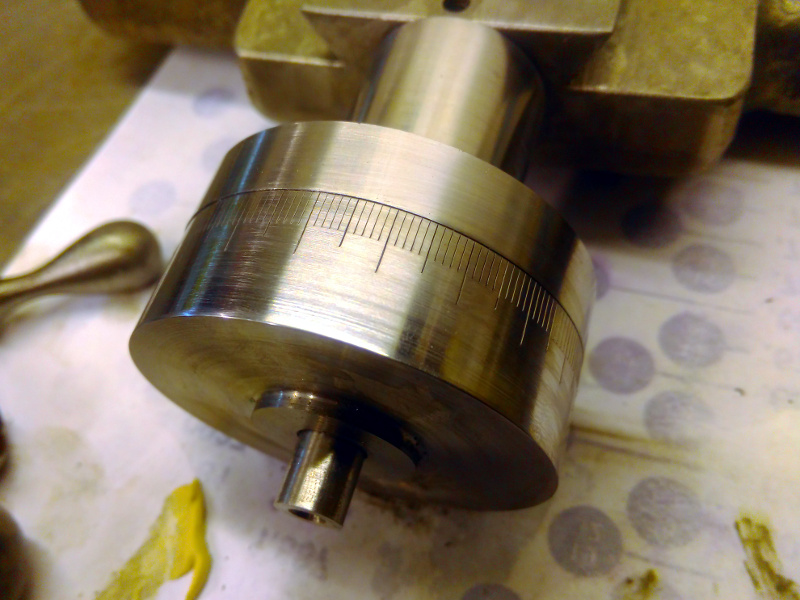
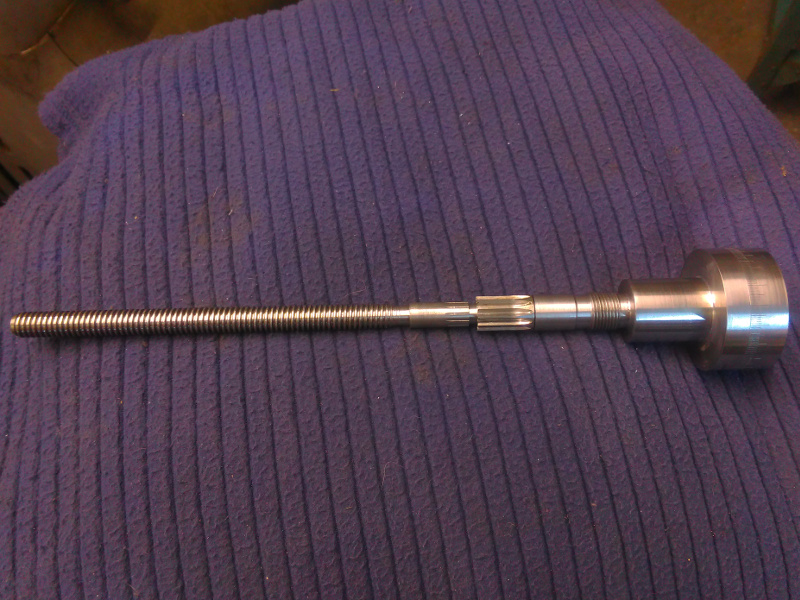
I turned a chunk of steel down. Filled my chip pan with little blue curly chips.
After that I cut a very odd sized thread in the end to screw it in - 25/32" - 16tpi. It;s an odd size to allow the gear on the screw to pass though the thread it screws into. No photo of this, sorry.
Then I turned the numbers dial from the same piece of 60mm stock. Put a small register on it to hold it concentric on my dividing head and tapped a central hole for a holding thread.
The original dial was 100 graduations for the 10TPI screw. Each thou on the dial is 1 thou of movement. Another way of doing it is to make the dial 'diameter reading' by doubling the diameter (what I am doing) and the number of graduations. This means that 1 thou on the dial removes 1 thou off the diameter. It effectively doubles the resolution. My dividing head is 40:1 ratio so 40 turns on the handle = 1 turn of the part. I need 200 divisions so I had to split each handle turn into 5 positions. I got a plate with 20 holes and taped it over (to reduce the risk of mistakes then marked 5 holes with marker pen. Red for one hole (the 10's and 5's and green for the others (the 4 little marks in between).
The pictures show it better. Here I'm using one (red) hole to cut the tens first then the 5's. I did one lap taking 2 turns at a time to cut the long ones then skipped a turn and did the same for the short marks. Less chance of making a mistake that way.
Then I shortened up the stop and used the green marks to cut the 1,2,3,4 divisions in between.
The marks came out really nice, but ever so slightly shallower one side than the other. Not even noticeable but this caused me a problem later. Here's the dial and screw together.
Pete.
Member
- Messages
- 14,832
- Location
- Kent, UK
I bought some small number stamps and cobbled-up a jig to line the numbers up nicely. The jig is just a scrap block with some 1-2-3 blocks clamped to it. I had a piece of brass rod which poked into one of the holed and piece of stainless with a hole through it as a weight.
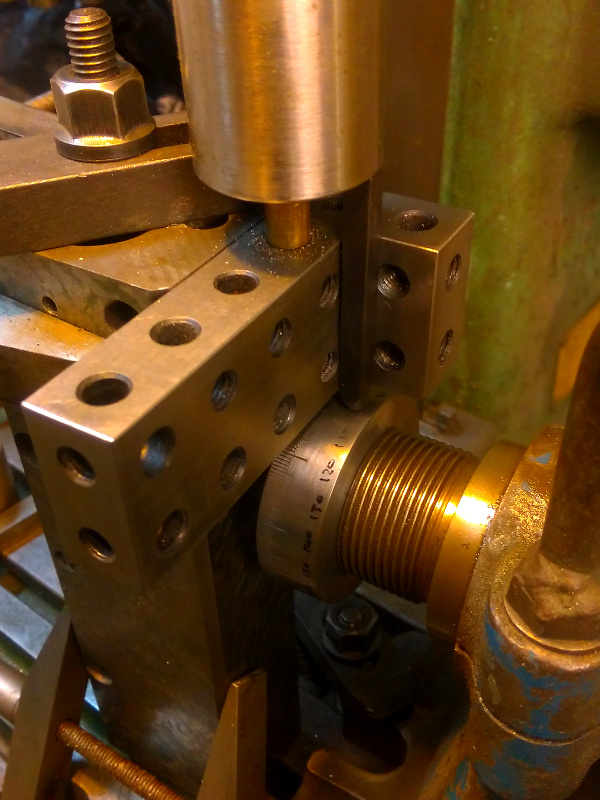
The idea was that I did a test to get the right weight then marked the height on the rod. This should stamp all of the numbers to a similar depth for a professional look.
First one came out fine. This is the middle 0 of 100. I wrote all the numbers in pen so I didn't mess up.
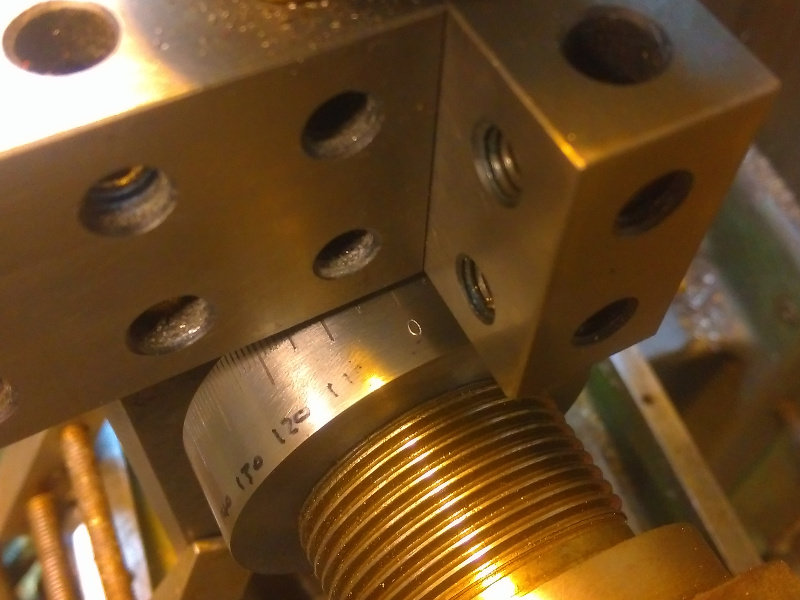
After that it all went wrong. I found that the stamps I got off ebay didn't have the numbers forged properly square to the shank, and the heights were randomly different too. The 0 came out at a perfect depth, the 1's all punched deep into the metal but the number is a slightly smaller size. The 5 and 8 were both twisted slightly AND didn't punch properly at the bottom, partly because they were poorly manufactured and partly because there's much more of a number to stamp, so the larger numbers need a bit more height on the rod for the weight to punch them properly.
And that's where I'm at. I've ordered another set of punches which are old-style but much better made. I have to turn the OD off the dial and re-mark all the graduations then re-stamp all the numbers. You can read all of the numbers right now but some of them are not fully punched and I don't want it looking like half a job.
The idea was that I did a test to get the right weight then marked the height on the rod. This should stamp all of the numbers to a similar depth for a professional look.
First one came out fine. This is the middle 0 of 100. I wrote all the numbers in pen so I didn't mess up.
After that it all went wrong. I found that the stamps I got off ebay didn't have the numbers forged properly square to the shank, and the heights were randomly different too. The 0 came out at a perfect depth, the 1's all punched deep into the metal but the number is a slightly smaller size. The 5 and 8 were both twisted slightly AND didn't punch properly at the bottom, partly because they were poorly manufactured and partly because there's much more of a number to stamp, so the larger numbers need a bit more height on the rod for the weight to punch them properly.
And that's where I'm at. I've ordered another set of punches which are old-style but much better made. I have to turn the OD off the dial and re-mark all the graduations then re-stamp all the numbers. You can read all of the numbers right now but some of them are not fully punched and I don't want it looking like half a job.
slim_boy_fat
Member
- Messages
- 29,532
- Location
- Scottish Highlands
Pete.
Member
- Messages
- 14,832
- Location
- Kent, UK
Thanks mate - and to the others for the kind comments.
This and the Cataract bench lathe will be the last refurbs I do before I tackle my own two lathes - the Hardinge HLV first and then the Monarch once the HLV is operational. After that it'll be the Herbert Mill. That lot should keep me busy all of next year.
This and the Cataract bench lathe will be the last refurbs I do before I tackle my own two lathes - the Hardinge HLV first and then the Monarch once the HLV is operational. After that it'll be the Herbert Mill. That lot should keep me busy all of next year.
Bill Edwards
Member
- Messages
- 4,959
- Location
- Scarborough, North Yorkshire
Nice work, great shame about the rubbish punches.
Enjoying the thread.
Enjoying the thread.
Pete.
Member
- Messages
- 14,832
- Location
- Kent, UK
I've done some soul searching and decided to send the bed for grinding. Since I've done so much hard work scraping everything else in I couldn't leave the main bedway in any doubt, expensive as it is to have done. Once that's ground the lathe should work literally as good as new, with the additional benefits of thrust-bearings in the cross slide and the large dial it should actually be better than new.
I've also given up on the idea of trying to reproduce the lathe's data plates and ordered some reproductions from a guy in America. They are beautifully made and the time I would have to invest to do half as good a job doesn't make any sense.
I've also given up on the idea of trying to reproduce the lathe's data plates and ordered some reproductions from a guy in America. They are beautifully made and the time I would have to invest to do half as good a job doesn't make any sense.


 Remember to hang it from a nail and hit with a hammer


