You are using an out of date browser. It may not display this or other websites correctly.
You should upgrade or use an alternative browser.
You should upgrade or use an alternative browser.
New Aldi "Ferrex" cordless tool range
- Thread starter eddie49
- Start date
Onoff
In the land of the unfinished project I am King!
- Messages
- 12,154
- Location
- Sevenoaks, UK
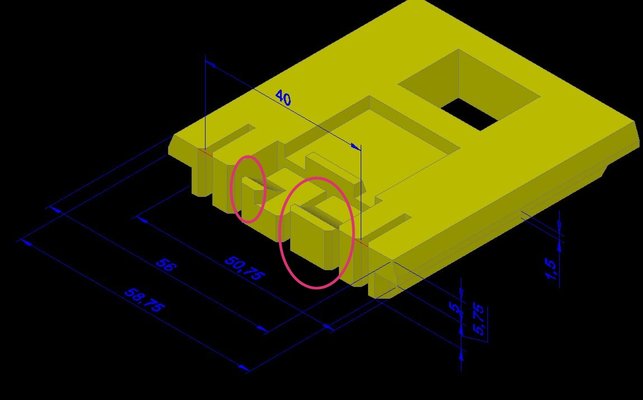
Those two tabs..View attachment 237088 View attachment 237089
So I just need to reduce them in height?
View attachment 237082
The parts catching are the two black lugs where the blue plastic changes to black.
[View attachment 237085
But I just took 1.6mm of the yellow tabs and it's perfect as you can see.
Gotcha. Would 1mm less do it? I'm measuring 3mm on the battery where I've got it as 2mm on the model?
Easy one to sort! On to the pita other end now!
Onoff
In the land of the unfinished project I am King!
- Messages
- 12,154
- Location
- Sevenoaks, UK
Help!!!
This was another attempt at the Pug petrol cap cover in black RS Pro PLA. 0.2 layers. 200degC head, 50degC bed. 50m/s. 25% infill. Support roof used, 0.7mm horizontal and 0.2mm vertical spacings.
To me it looks rubbish. I don't get involved with the actual printing or Cura or Fusion 360. My lad does all that. If I tell him it looks **** SWMBO tells me off!
Printed this way up:

The underside that had supports:

Tbh he's never been able to get very good surfaces above supports.
And this hole should have been a clean 19mm dia. Lad thinks it's because he chose to iron the top layer of the recess:

This was another attempt at the Pug petrol cap cover in black RS Pro PLA. 0.2 layers. 200degC head, 50degC bed. 50m/s. 25% infill. Support roof used, 0.7mm horizontal and 0.2mm vertical spacings.
To me it looks rubbish. I don't get involved with the actual printing or Cura or Fusion 360. My lad does all that. If I tell him it looks **** SWMBO tells me off!
Printed this way up:
The underside that had supports:
Tbh he's never been able to get very good surfaces above supports.
And this hole should have been a clean 19mm dia. Lad thinks it's because he chose to iron the top layer of the recess:
Send me the STL mate. Let's see how it prints here.Help!!!
This was another attempt at the Pug petrol cap cover in black RS Pro PLA. 0.2 layers. 200degC head, 50degC bed. 50m/s. 25% infill. Support roof used, 0.7mm horizontal and 0.2mm vertical spacings.
To me it looks rubbish. I don't get involved with the actual printing or Cura or Fusion 360. My lad does all that. If I tell him it looks **** SWMBO tells me off!
Printed this way up:
View attachment 237104
The underside that had supports:
View attachment 237105
Tbh he's never been able to get very good surfaces above supports.
And this hole should have been a clean 19mm dia. Lad thinks it's because he chose to iron the top layer of the recess:
View attachment 237107
Yes I think so. It's relative to where it slides as well. My battery is worn. The printed part is not.So I just need to reduce them in height?
Gotcha. Would 1mm less do it? I'm measuring 3mm on the battery where I've got it as 2mm on the model?
View attachment 237102
Easy one to sort! On to the pita other end now!
Onoff
In the land of the unfinished project I am King!
- Messages
- 12,154
- Location
- Sevenoaks, UK
Send me the STL mate. Let's see how it prints here.
Cheers. Will do.
Onoff
In the land of the unfinished project I am King!
- Messages
- 12,154
- Location
- Sevenoaks, UK
That's the Mak2Fer adapter done and ready to test print!
I've really dumbed this down to 2 parts. There's no spring operated release button to take the adapter off of the Ferrex tool as I'll never be buying Ferrex batteries as Makita is my chosen platform. The adapter will stay on the tool forever. It's a case of slide on the adapter and drop in the "wedge" which I've yet to draw up. I'll likely keep that in place with a drop of silicone so the adapter could be removed later if needs be. Just got to wait for my printer to wake up!


I've really dumbed this down to 2 parts. There's no spring operated release button to take the adapter off of the Ferrex tool as I'll never be buying Ferrex batteries as Makita is my chosen platform. The adapter will stay on the tool forever. It's a case of slide on the adapter and drop in the "wedge" which I've yet to draw up. I'll likely keep that in place with a drop of silicone so the adapter could be removed later if needs be. Just got to wait for my printer to wake up!
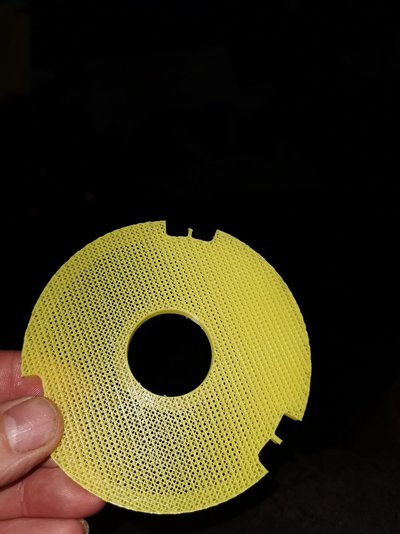
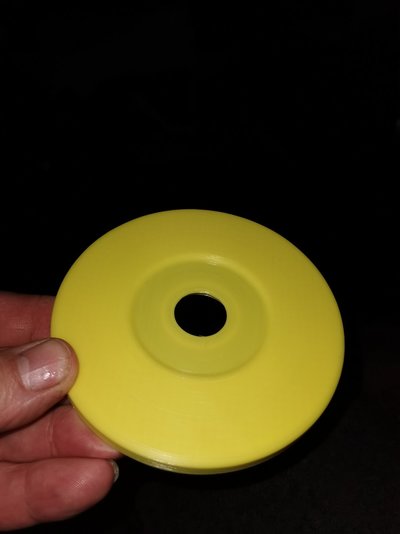
The bottom one is as it came of the printer.
Next one up is the reverse side.
Not that happy with the finish but as it's above supports it's passable. But I feel sure with some practice I can smooth it out with adjusted settings.
Third one up is the smoothed out finish.
The top one amazingly is the support. Came out beautiful.....lol
Onoff
In the land of the unfinished project I am King!
- Messages
- 12,154
- Location
- Sevenoaks, UK
This is the Makita battery to Ferrex tool adapter just finished after 7+ hours. RS Pro PLA. Basically upped the resolution to try and improve the quality. It's actually pretty good imo. Black is very, very unforgiving in photos and shows every blemish, especially with a reasonable camera. Still has the supports in, yet to cool down then we'll remove them. Printed Ferrex side down. There's a funny "badminton net" stringing thing on top but that should come off easy enough:


Onoff
In the land of the unfinished project I am King!
- Messages
- 12,154
- Location
- Sevenoaks, UK
View attachment 237289 View attachment 237291 View attachment 237292 View attachment 237293
The bottom one is as it came of the printer.
Next one up is the reverse side.
Not that happy with the finish but as it's above supports it's passable. But I feel sure with some practice I can smooth it out with adjusted settings.
Third one up is the smoothed out finish.
The top one amazingly is the support. Came out beautiful.....lol
Liking that a lot. What settings out of interest? What material? The "smoothed out" finish...fume cabinet?
Onoff
In the land of the unfinished project I am King!
- Messages
- 12,154
- Location
- Sevenoaks, UK
I will send you my Cura profile. It's basically the Chep Cura 4.6 with a couple of mods to smooth it.Liking that a lot. What settings out of interest? What material? The "smoothed out" finish...fume cabinet?
Its just PLA from 3DQF.
Smoothed out finish is a Cura setting.
Those pics are straight from the bed. No fume cabinet.
Different material...even colours from the same range can print slightly different. It can get very very frustrating.It doesn't fit!
Well, the Makita battery fits the adapter perfectly but the adapter won't then slide into the Ferrex tool. It's just too tight. You can hear the layers cracking if you try and force it!
How can it not fit? @ukracer printed the same. STL I sent him and that fits his Ferrex tool!
Send it me and I will print with the yellow PLA and see what we get.
Onoff
In the land of the unfinished project I am King!
- Messages
- 12,154
- Location
- Sevenoaks, UK
Different material...even colours from the same range can print slightly different. It can get very very frustrating.
Send it me and I will print with the yellow PLA and see what we get.
Will do & thanks. This is soul destroying. Could be the wine from Iceland I've just drunk mind. Not the country btw, the supermarket!
A sorry tale. Where the supports were is about as smooth as a wicker basket!
Onoff
In the land of the unfinished project I am King!
- Messages
- 12,154
- Location
- Sevenoaks, UK
I'm just printing a slice to trial fit in the Ferrex tool. I had 5+5mm whereas I think 6+4 might be better. Also on the width I have 52mm though I think really it should be a bit of a taper. So on my model the little red tapers aren't there. Tbh a bit needs to come off the 52/56mm anyway for clearance.

Lol...yes I am....what's wrong with it.@ukracer , apologies but if you're mid print with that Makita 2 Ferrex adapter it might not fit!
Onoff
In the land of the unfinished project I am King!
- Messages
- 12,154
- Location
- Sevenoaks, UK
Lol...yes I am....what's wrong with it.
Look at the slice I drew above. That's "5&5" on the bit that slides into the Ferrex on the 2nd test piece that fits, that you printed earlier and said fitted perfect after I corrected the angle.
It didn't fit here. Maybe to with the rough print here or different printer/materials like you said.
Changed it to "6&4". Tried a slice at that and it's a sweet, transition fit pretty much.
I'm going too to widen the slots where the copper fits in. Drawn at 1mm, they're coming out a bit tight here.
Ok I will let it run not too long to go now..Look at the slice I drew above. That's "5&5" on the bit that slides into the Ferrex on the 2nd test piece that fits, that you printed earlier and said fitted perfect after I corrected the angle.
It didn't fit here. Maybe to with the rough print here or different printer/materials like you said.
Changed it to "6&4". Tried a slice at that and it's a sweet, transition fit pretty much.
View attachment 237380
I'm going too to widen the slots where the copper fits in. Drawn at 1mm, they're coming out a bit tight here.


