You are using an out of date browser. It may not display this or other websites correctly.
You should upgrade or use an alternative browser.
You should upgrade or use an alternative browser.
Stuff you have made today
- Thread starter God mode restorations
- Start date
eLuSiVeMiTe
Member
- Messages
- 16,444
- Location
- ......
And some more progress.A not very productive hour.
Tranny in the garage has given up. There's two in the lock up and one left on site today.
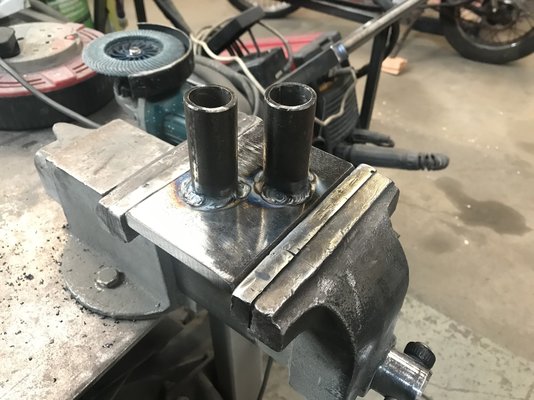
Hacksaw to the ready and two cuts made. Cleaned em up on the mill. Then clamped the two parts and one original foot in the vice and drilled in one hit.
Il mill some steps in the top tomorrow evening and get the mounting holes transferred over. Bit late now.
Feet for a small 3p motor. Mounts don't line up with my scroll saw base and thankfully this motor has removable feet.
View attachment 177368
Turned some m6 bolts into round slots last night then went for measurements for mounting holes.
Cant get those until I line up the pulley.
Problem is it didn't fit.
Found a 1" hardened bar and set to it.
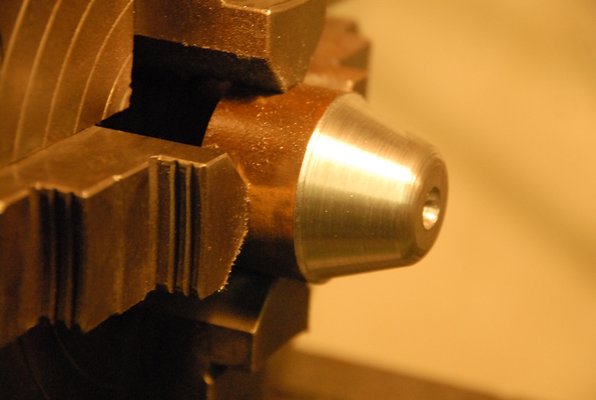
Drilled to 12mm then bored out to just shy of 14mm
Left some meat on the bottom and turned it down to 16mm Locates into a ridge on the motor shaft and the pulley sits snug on it. Also gave me somewhere I coukd grip it well in the chuck.
Getting better. Perfect fit on the shaft and bore.
Loctite and pressed into the pulley then get the persuader out and tap it on the shaft.
Il align and mark the mounting holes tomorrow then make the new feet look less like slabs of billet.
Big hole in that o/s tyre,is that the job to start?A job I wish I'd never started
View attachment 177527
mr migwire
It's more fun with metal.
- Messages
- 1,874
- Location
- fife
a signal lamp that would be placed inside a semaphore signals lamp holder we ahve a few here and i am now restoring a lattice signal post with lamp holder to hold one of these, they look the part when polished and the wicks trimmed just right.View attachment 176855
This nice old Railway lantern.
Was in good condition, lightly restored and complete.
Didn't need my to repair and get it back to use. Just a good clean with Meths. to remove some sort of wax finish on.
View attachment 176856
The wick holder has 2 wicks fitted, But only the longer and thinner one is adjustable. It does work and adjust in a smooth manner.
View attachment 176857
It is made by:
Lamp Manufacturing & Railway supplies Ltd.
London.
I think this lantern dates from about 1840.
Fuelling with modern lamp oil (thinner than the old stuff) showed a small weep on the bottom copper plate. But a old copper soldering iron was used to repair it with some plumbers solder.
View attachment 176858
I know I could of used a modern Iron and modern solder, but were is the fun in that?
I had to old tools they may of used in the past.
Besides it was fun.
View attachment 176859
Finished and working.
Now to find space to show it off.
Woody.v8
Blue gluer
- Messages
- 4,166
- Location
- staffs
No holes in the tyres, its a water patchBig hole in that o/s tyre,is that the job to start?
Dcal
Member
- Messages
- 3,986
- Location
- Antrim Northern Ireland
Today i made an adapter so my ancient compression tester would work on 12mm plugs.
I could have got one in Halfords (only place open when I discovered it didn't fit) but they wanted a penny off £40 and a compression tester kit and it would have taken me longer to go and get it than I spent making the adapter.


I could have got one in Halfords (only place open when I discovered it didn't fit) but they wanted a penny off £40 and a compression tester kit and it would have taken me longer to go and get it than I spent making the adapter.
jordhandson
Member
- Messages
- 1,446
- Location
- Dorset
There some clever stuff being done above love it,
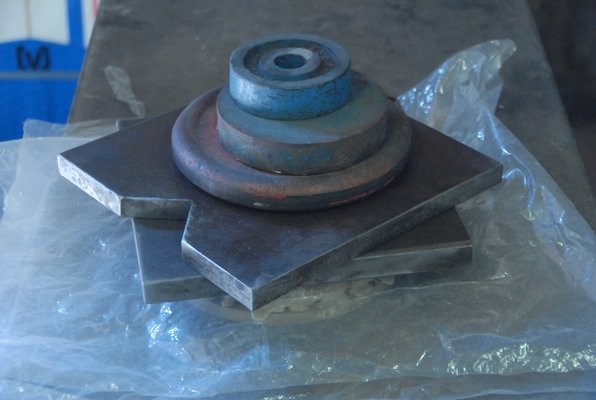
Not today but been working as and when for a few nights. Its not my normal run of the mill but doing a favor for one of my customers kids his toddler broke his steering wheel so , as you do I said drop it of I will sort it I know I could have bought on cheaper and fitted it in less time but we are what we are boys with tools so I decided to make him a wood steering wheel hope the picture tells the story if quicker than writing..,,
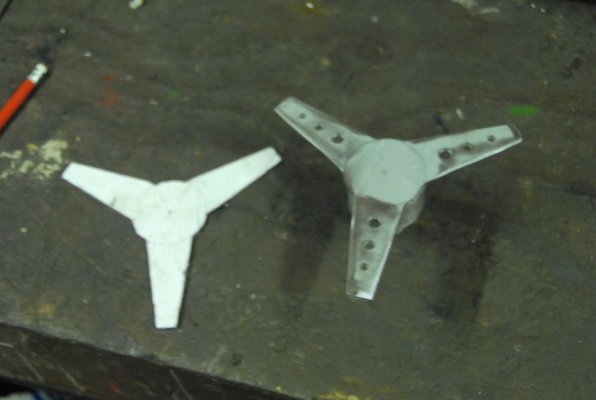
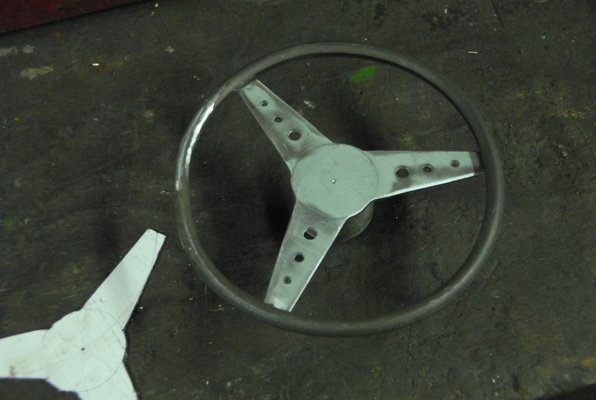
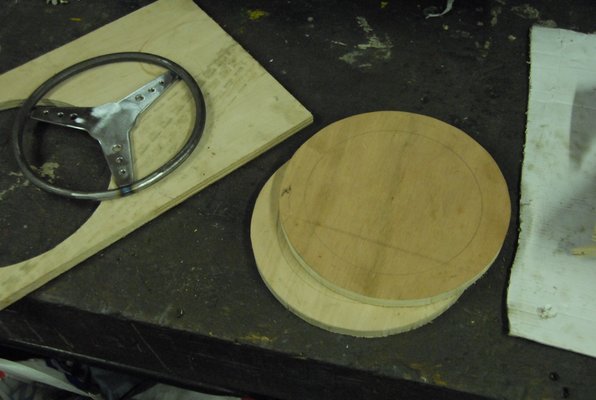
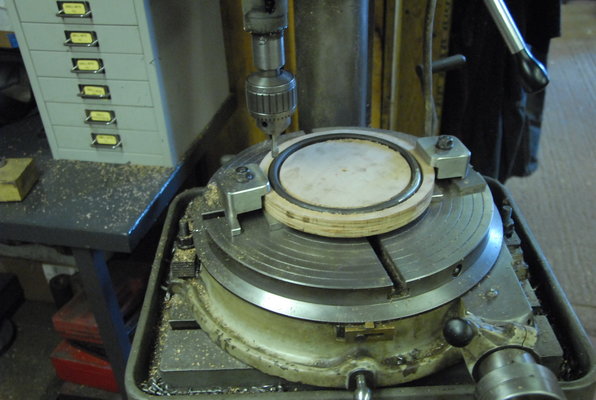
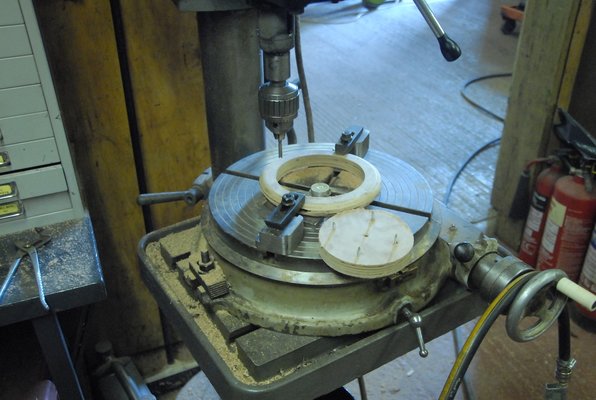
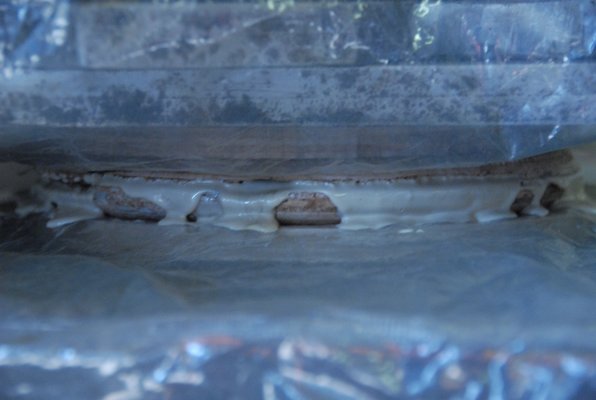
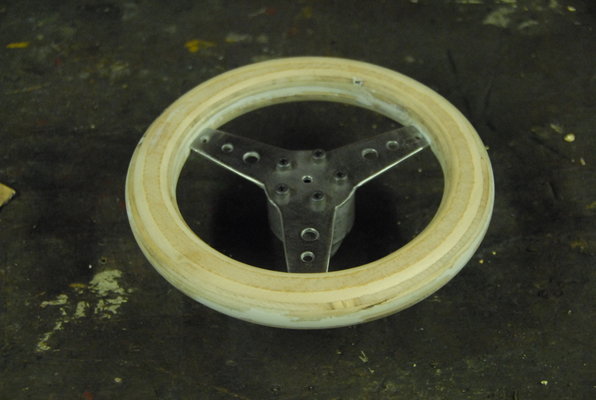
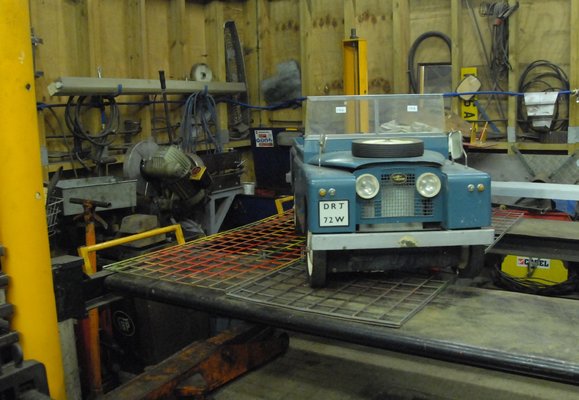
All ready for staining before varnishing its going on this little beauty
Cheers
Not today but been working as and when for a few nights. Its not my normal run of the mill but doing a favor for one of my customers kids his toddler broke his steering wheel so , as you do I said drop it of I will sort it I know I could have bought on cheaper and fitted it in less time but we are what we are boys with tools so I decided to make him a wood steering wheel hope the picture tells the story if quicker than writing..,,


All ready for staining before varnishing its going on this little beauty

Cheers
zx9
Forum Supporter
- Messages
- 5,179
- Location
- South East London
I liked how you have made the steering wheel it reminds me of the steering wheels we made for the karts which we raced in the early eighties when we took part in the Shell National Schools Karting competitions.There some clever stuff being done above love it,
Not today but been working as and when for a few nights. Its not my normal run of the mill but doing a favor for one of my customers kids his toddler broke his steering wheel so , as you do I said drop it of I will sort it I know I could have bought on cheaper and fitted it in less time but we are what we are boys with tools so I decided to make him a wood steering wheel hope the picture tells the story if quicker than writing..,,
View attachment 177547 View attachment 177549
View attachment 177550 View attachment 177556
View attachment 177551 View attachment 177552
View attachment 177553 View attachment 177554
View attachment 177555
All ready for staining before varnishing its going on this little beauty
View attachment 177557
Cheers
henry Kadzielski
Member
- Messages
- 1,215
- Location
- Australia Wollongong
Good morning gents my two cants worth, just the last few days
Turned this

Into this

haven't passivated it yet, but you get the picture. This rusty bracket, out of 5mm steel angle was holding a spherical bearing with a taper lock shich was taking all the thrust from the prop shaft to the vessels keel. It was also held down with 6 only 8mm by 40mm coach screws


 . What possesed the original boat builder to do this is beyond me

 . Nevertheless he did. The new owner got a rope caught in the prop which just peeled this bracket off the keel. Imagine that. This is still not what I would do, I would at least through bolt this bracket through the keel, but the vessel is in the water and has a concrete keel underneath
 . Anyway will be passivating the new bracket tonight and installed on saturday
Turned this
Into this
haven't passivated it yet, but you get the picture. This rusty bracket, out of 5mm steel angle was holding a spherical bearing with a taper lock shich was taking all the thrust from the prop shaft to the vessels keel. It was also held down with 6 only 8mm by 40mm coach screws


 . What possesed the original boat builder to do this is beyond me

 . Nevertheless he did. The new owner got a rope caught in the prop which just peeled this bracket off the keel. Imagine that. This is still not what I would do, I would at least through bolt this bracket through the keel, but the vessel is in the water and has a concrete keel underneath
 . Anyway will be passivating the new bracket tonight and installed on saturday
captain-destructo
all the gear no idea
- Messages
- 1,120
- Location
- Thornaby Teesside uk
could you not drill the concrete and resign some threaded bar into it? obviously avoiding drilling all the way through!!!Good morning gents my two cants worth, just the last few days
Turned this
View attachment 177571
Into this
View attachment 177572
haven't passivated it yet, but you get the picture. This rusty bracket, out of 5mm steel angle was holding a spherical bearing with a taper lock shich was taking all the thrust from the prop shaft to the vessels keel. It was also held down with 6 only 8mm by 40mm coach screws. What possesed the original boat builder to do this is beyond me
. Nevertheless he did. The new owner got a rope caught in the prop which just peeled this bracket off the keel. Imagine that. This is still not what I would do, I would at least through bolt this bracket through the keel, but the vessel is in the water and has a concrete keel underneath
. Anyway will be passivating the new bracket tonight and installed on saturday
henry Kadzielski
Member
- Messages
- 1,215
- Location
- Australia Wollongong
Good morning gents, Just finished pasivating and it looks a bit 'shinya' Aussi talk. For those that don't understand more shiny . No idea what the concrete is like underneath so am not going there, the keel is also bolted up through the ribs going over the keel 'strange arrangement'. In my humble opinion the keel should be lowered and the bracket through bolted
 . No idea what the concrete is like underneath so am not going there, the keel is also bolted up through the ribs going over the keel 'strange arrangement'. In my humble opinion the keel should be lowered and the bracket through bolted
The_Yellow_Ardvark
https://www.death-clock.org/
- Messages
- 19,812
- Location
- Going Away.
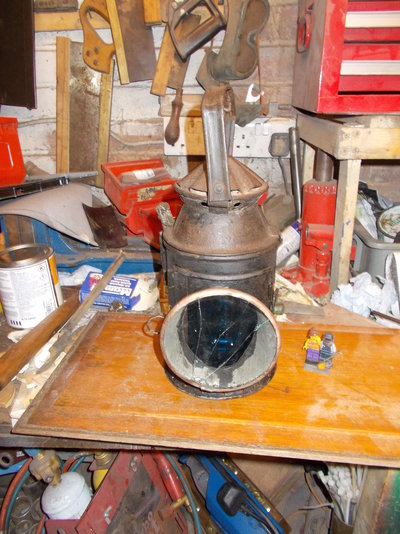
I recently acquired this fine example, well it was fine until I managed to catch it on a vice and damage it.
Bent bezel, broken glass and the silver painted metal ring creased. A Good job.
First job, strip it down.
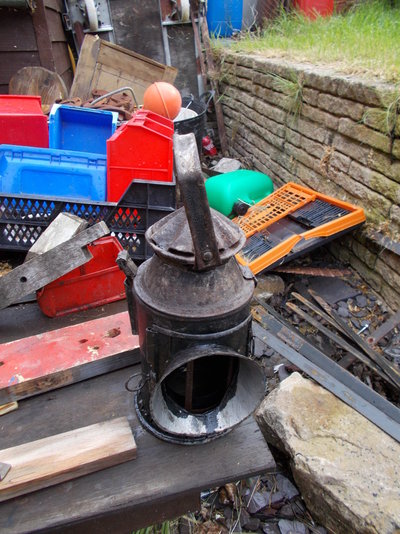
It was then placed into hot caustic soda, as we know not a present job. But with regular washing off and re-submerriging had the paint off. Plus some 2 pack glue holding bits on.
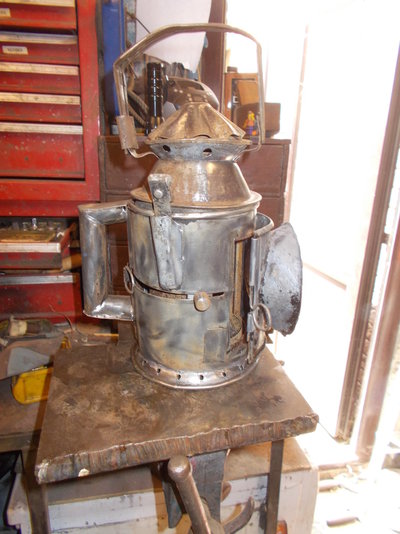
Here you see it striped of paint and rust. It had distorted a bit in the hot caustic and hot Citric acid. But when I was using a gas torch to lead solder the metal parts it allowed me to bend the lantern as true as possible, without creasing the tin plate.
You can also see the ring used to hold the glass is now dressed back to shape. I used a few light hammers, wooden forms and clamps to gently ease it back. Sadly it had stretched, but that was only noticeable when I came to re-glaze it.
Using a Dermal I cut out the braze joints to allow all the parts to be removes and painted. I then tin solder the joints back together, after painting the internal glass frames.
The colour glass handles are secured by "D" rings. 2 had suffered badly over time. But removing them, heating red heat and allowing to cool slowly allowed me to re shape. Then headed to red heat and quenched into cold water means they are reused.
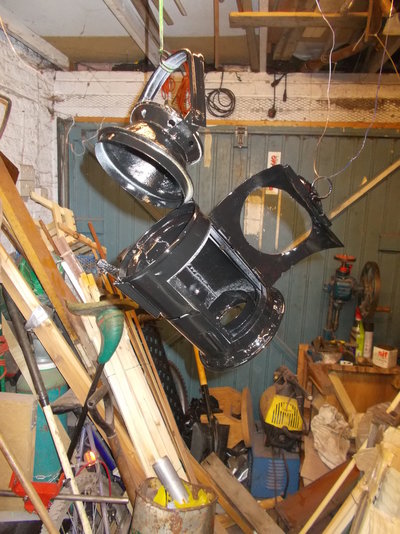
First of the top coats. It had grey primmer, then a filler primer. Sanded back between coats. Final coat was a clear lacquer.
The thin metal moves so easy, so extra car had to be taken. To reform the glass frames and 3mm thick bit or perplex was heated and bent to the shame curve and was used as a former.
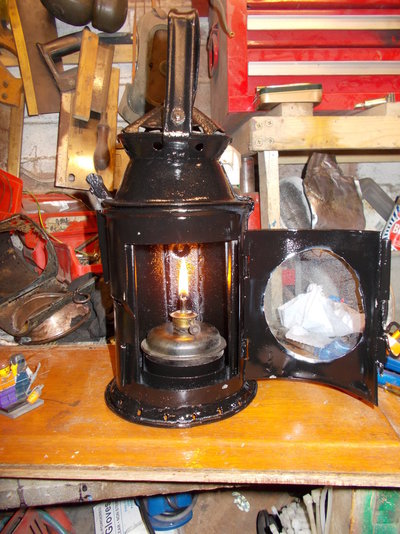
The wick holder and tank. This is an original unit, Good condition. But the wick gear needed a dress with a file to make it grip the wick. I using a modern lamp oil, what is meant to have an additive to keep bugs away.
Also you can see the new glass bedded in. Not with linseed putty, but a modern form in a tube.
It turns out the original glass was not circular, but oval. So my attempts at cutting a circle were a lesson in cutting glass.
But £2 got me a new lens cut locally.
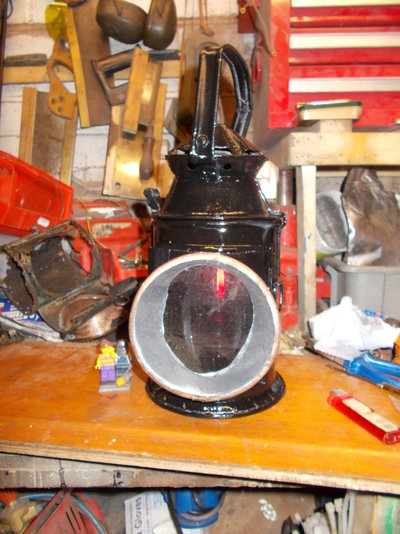
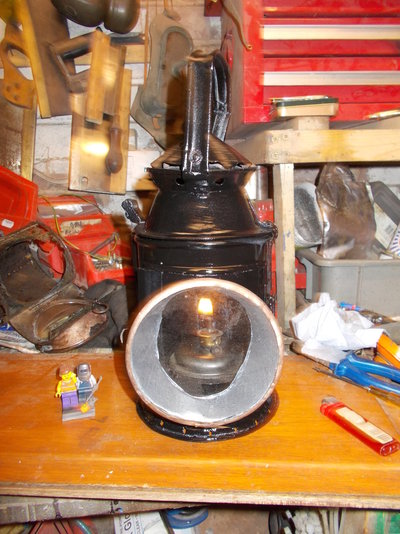
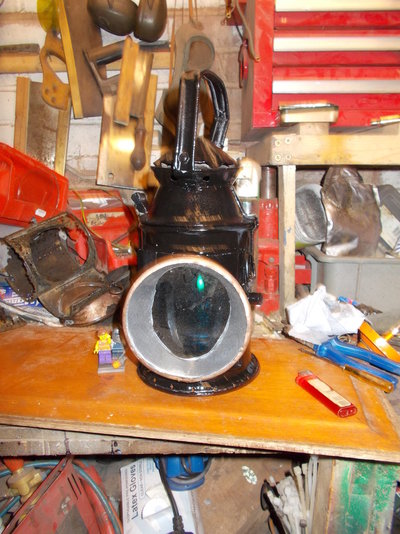
The silver you see is "Silver" leaf. Not a good finish. Not due to the leaf, but what it was attached to. The roughness of the ring means it does not look shinny from any distance. Apart from up close. The copper bezel did not buff up. It is shinny, but looks dull
Only new parts was the glass, the putty and the paint.
eLuSiVeMiTe
Member
- Messages
- 16,444
- Location
- ......
Well that was anticlimatic.And some more progress.
Turned some m6 bolts into round slots last night then went for measurements for mounting holes.
Cant get those until I line up the pulley.
Problem is it didn't fit.
Found a 1" hardened bar and set to it.
Drilled to 12mm then bored out to just shy of 14mm
Left some meat on the bottom and turned it down to 16mm Locates into a ridge on the motor shaft and the pulley sits snug on it. Also gave me somewhere I coukd grip it well in the chuck.
Getting better. Perfect fit on the shaft and bore.
Loctite and pressed into the pulley then get the persuader out and tap it on the shaft.
Il align and mark the mounting holes tomorrow then make the new feet look less like slabs of billet.
View attachment 177529 View attachment 177530 View attachment 177531 View attachment 177532 View attachment 177533 View attachment 177534 View attachment 177535
Slots milled and fitted in place.
Plug the vfd in. Motor chugs but no movement
Dig out a manual and check the settings.
Still as they should be. Was fine when tested last year
Cba tonight. Il check wiring tomorrow.
Woody.v8
Blue gluer
- Messages
- 4,166
- Location
- staffs
No not if it's private hgv or recovery plus you can keep what you want at home as long as it's not operating from there, I used to keep my 26 ton truck at home plus a few coaches years back.Do you need an o license to keep that at home.
No not if it's private hgv or recovery
Thanks.
Recovery don’t need to run tachos either do they.


